Sunday, April 7, 2013

Apple Pie Pockets

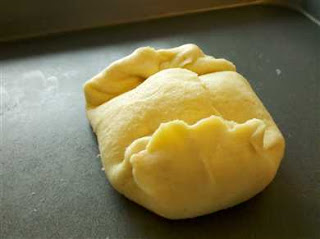
I try to avoid baking because my husband and I end up eating entire batches to ourselves.  I know I can toss leftovers in the freezer but lets be honest, we'd just end up eating frozen cookies.  Today is a hang -round-the-house-and-get-shit-done day so I told my husband I'd make any baked good that he wanted. I barely got the offer out and he said 'apple pie'. Alrightly then.  I wasn't going to slave away and make homemade pie crust so I decided on individual pie pockets using puff pastry that has been hanging around my freezer for a few months.  These little guys turned out great! Super easy and cute (that's what he said).

Yield: 6 servings/individual pockets

Ingredients
1 square or roll of puff pastry
1 large apple (or 2 small), peeled and sliced into small cubes
1/3 cupbrown sugar
2 teaspoons flour
1 teaspoon lemon juice
1 teaspoon cinnamon
1/8 teaspoon nutmeg
1 egg, beaten

Method
Thaw puff pastry for two hours at room temperature. Peel, core and chop apples up into little cubes. Combine apples with sugar, flour, lemon juice, cinnamon and nutmeg. Preheat oven to 400F. Flour surface lightly and roll out your puff pastry as big as possible in a square shape. Cut pastry sheet into 12 3x3 squares. Place about 2 tablespoons of apple mixture on each square. Place second pastry square on top form a pocket. Press down the edge with fingers to seal and then press with fork to decorate the edges. Brush top with egg and sprinkle with sugar. Using a fork, pierce top of each square. Place on ungreased cookie sheet. Bake for 20-23 minutes. Enjoy!

Monday, April 1, 2013

Spam

...and I'm not talking about the canned meat.  It appears that I've been hit with a lot of spam in the form of odd comments on my blog and I had no idea until now.  It has apparently been happening for months so I've had to beef up my security on here.  If you've read any weird comments that include porn links ignore them.....or not. Whatever floats your boat.  I've tried my best to delete all of them, or save them to my 'favourites' so I hope my cooking blog is back to it's clean old self. Maybe it's all the 'that's what she said' lines I use. hmm...

So back to the canned meat. Has anyone ever tried spam before?...

Caribbean Sunset Soup

My homeboy
When I cook I usually google things like "recipes with sweet potato" and review about 5 recipes to come up with a plan, which usually consists of a combo of a few recipes.  I don't like following recipes -- I find them restrictive.  This sometimes gets me into trouble, with final products that are epic fails. However more often than not it turns out great and it helps me use up ingredients that I have laying around my house without having to run out to the grocery store to grab one stupid ingredient because we all know how much I love grocery shopping. Every now and then I rip out recipes from magazines that I think sound delish.  I toss them in my junk drawer never to be seen again.  Today when I was riffling around the drawer for a pen I came across a pile of recipes collecting dust.  Dammit. I have the day off today and little to do so there was no excuse. Time to use one of them. I picked a recipe that I knew I had most ingredients for and substituted the rest. I settled on Caribbean Sunset Soup from Fresh Juice, a fantastic free magazine that we get in the mail because we are President's Choice customers. Thanks to you, Galen Weston Jr. my house smells yummy!  Here is my adaptation of the recipe.
Ingredients
1 tablespoon olive oil
2 large sweet potatoes, peeled & cubed
1 large onion, chopped
3 cloves garlic, minced
3 cups veggie or chicken stock
3/4 of a tin of light coconut milk
juice of 1 lime, a the zest of half
1/4 teaspoon black pepper
1/4 coriander (it called for fresh cilantro to garnish but that stuff makes me ralph)
1 teaspoon mild Indian curry paste (*I didn't have this so I used 1/2 teaspoon dried hot pepper flakes, 1/4 teaspoon turmeric, 2 teaspoons garam masala,1 1/2 tablespoons fresh ginger)

Method
In a large soup pot over medium heat warm oil and toss in garlic, onion and all the spices. Cook for about 4 minutes or until onions turn translucent. Add cubed potatoes and stock and bring to a boil.  Cover and simmer for 20 minutes or until potatoes are tender.  Transfer to a food processor and puree.  Return back to the pot.  Over low heat slowly stir in the coconut milk, the juice from 1 lime and a little of the zest. Stir and serve with triangles of warm naan bread.

Thursday, March 28, 2013

Happy Easter

Happy Easter!
 
 
Enjoy the long weekend. Surround yourself with good people and good food.


Monday, March 25, 2013

Homemade Dishwasher Detergent

Only a few more products to go and this house will be au naturel.  This afternoon I said buh-bye to the expensive Finish Powerball Dishwasher Tablets that I've used for years.  Don't get me wrong, they work so well however those bad boys will run you about $8.00+ for a 25 pack and who knows that type of chemical crap is going down the drain.  I just made a huge batch of homemade dishwasher detergent and it worked out to be about $0.12 a load. Can I get a BOOYA!?! It was super duper easy and only took about 4 minutes to make.  Amaze-balls.

*Update: I ran 1 load using 1 tablespoon and it sucked.  I tried again today and used 2 tablespoons and it was pretty good. Not as spectacular as the Finish tablets I usually use. It left some water spots so I'm going to take the advice of some other bloggers and add a splash of white vinegar in the bottle of the dishwasher before running it next time.

*Update #2: I decided that this recipe is a bust.  It works best when you use at least 2 tablespoons with a splash of vinegar but the cost savings wasn't enough as I'd like so I have converted back to my power ball detergent tablets. There are a few commercial household products that I cannot seem to face getting rid of, and this is one of them.

Yield: 50+ loads

Ingredients
2 cups borax (laundry isle)
2 cups washing soda (laundry isle)
2 cups Epsom salt (personal care isle with bubble bath)
1/2 cup citric acid (this is hard to find this time of year.  Bulk Barn carries it year round)
1 of those silica gel packets you get in shoe boxes or vitamin bottles (this keeps it from clumping)

Method
In a large bowl mix everything together (except the gel packet).  Pour into an air tights container and put the silica gel packet on top.  Put 2 tablespoons of powder for each load of dishes.  If you have hard water apparently you can put a splash of vinegar in the bottom of the dishwasher.


Sunday, March 24, 2013

Pear & Brie Wrapped in Crescent Rolls

I'm not just saying that either. Cubed, sliced, melted -- I'll eat it any way it's given to me (that's what she said).  It's a bad habit. The only cheese that I don't like is blue cheese.  (Side note: Don't ever order Spicy Buffalo Chicken Pizza from Boston Pizza -- it has blue cheese and tastes like vomit).  For a treat every once in a while I bring home a small wheel of brie cheese.  I shouldn't but I do. It usually disappears fairly quickly however a few weeks ago I found that I had a half wheel left over and it needed to be used up asap or it was going to go be tossed (gasp! That can't happen!).  I made a rare purchase of Pillsbury crescent rolls at the grocery store to use with the leftover brie. I wrapped sliced pear and the leftover brie in the rolls. It was delish!  They were ridiculously easy to make and amazing for breakfast with a mug of coffee. I have some puff pastry in my freezer that I'd like to do this with next time I need to take an appetizer somewhere. mmmmm......


Forgot to take a picture but this is what they looked like (sortta!)
Pic borrow from here
Ingredients
1 package of Pillsbury crescent rolls
2 ripe pears, thinly sliced
1/2 small wheel of brie cheese, thinly sliced
a pinch of nutmeg

Method
Preheat oven to 375F. Unroll and separate out each dough triangle.  On each triangle place two sliced of pear and 1 slice of brie, sprinkle lightly with nutmeg and wrap dough around.  I didn't create the crescent roll shape but rather made sure the pear and cheese was sealed inside the dough so it wouldn't ooze out everywhere.  Place on a parchment paper lined cookie sheet and bake for about 12 minutes, or until the dough turns golden.  Serve warm.

Thursday, March 21, 2013

Broccoli Bites & No Damn Jerk Sauce


We are home from our amazing 5-day vacation in Jamaica and are feeling well rested, re-energized, and more than a few pounds heavier.  We had a great time away and spent some much need down time on the beach, tuned out and livin' the dream.  We experienced quite the adventure en route home which eventually lead us to having our bags searched and our beloved jerk chicken sauce confiscated at security. Long story short, I'm destine to be without jerk chicken sauce. Thankfully and fellow foodie colleague of mine has agreed to hand over his rumoured amazing recipe to me.  Fingers crossed.

One of the challenges of preparing for a vacation is working on emptying your fridge out as best you can before you hit the road to avoid wasting food.  We were scheduled to head to Detroit after lunch on Saturday and I knew I had an entire head of broccoli I needed to use up.  I stumbled across a broccoli bites recipe here and thought they would be tasty served with a bowl of soup.  I adapted the recipe a bit and they turned out pretty good! I dipped mine in ranch dressing while the hubster dipped in franks hot sauce. Yummy!

Yield: 8-10 patties

Ingredients
1 large head broccoli, cut into small-medium pieces and steamed
1 cup of grated cheddar cheese
2 tablespoons minced onion
3 eggs
1 cup of seasoned Italian breadcrumbs or plain breadcrumbs
1/4 teaspoon of each basil, oregano, thyme, parsley, garlic powder
salt & pepper

Method
Mix all the ingredients together in a large bowl. With your hands, form small patties (about the size of slidder burgers) and lay on a parchment lined baking sheet. Flatten slightly. Bake at 375F for 25 minutes, turning the patties after the first 15 minutes. Let cool and enjoy!


Picture borrowed from here

Saturday, March 2, 2013

Ya Mon!

Remember last March when I had a pretty unhealthy obsession with trying to create a jerk chicken recipe (proof; here, here, and here).  Well, the obsession has come to a whole new level.  My husband and I have planned to return to Jamaica again this March Break and I am determined to find an amazing recipe (or bottle of sauce) to bring home with me to enjoy when we are going through vacation detox.  I will keep you posted.  Not that you  actually care.  I'm pretty sure I'm the only person who gives two shits about the jerk chicken. Ah well, bring on the beach, drinks, sunshine and jerk chicken BABY...I mean Mon. Ya Mon. Ok wow, I'm out.


Mason Jars

A while ago I posted about organization here. I'm definitely not the most organized person but I have come up with yet another system that seems to work for me.  Enter; mason jars. My brother and sister-in-law were looking to get rid of a whole bunch of these guys and I decided to take them off their hands.  I have a ton of different baking ingredients on hand and the clutter and mismatched containers were driving me bonkers.  Thanks to my label maker (have I mentioned I LOVE my label maker!?) and an assortment of different sized mason jars my baking shelf is much more efficient.  My plan is to go to bulk barn to refill my missing ingredients so I don't have the packaging to contend with and I only purchase enough to fill the jar again. Check it. Booya!
Phone photo -- damn, I need an iphone!

Freezer Cooking - Beef Stew

Pic taken with my phone -- poor quality
A few weeks ago I posted about a batch of freezer cooking I did.  I've eaten three meals so far and I wasn't at all happy with one of them.  I ended up throwing half of it out because it was so Blah!  It was Pineapple Pork Tenderloin.  A chili recipe I used was alright, but it was pretty over cooked.  I won't even bother sharing either of those recipes because they totally weren't worth the work.  My classic chili recipe is far better.  I still have a few more meals to sample so I will keep you posted on how yummy/nasty they are. A recipe I actually liked was beef stew. It made enough for 6 large servings.  I'm not sure that I'll invest more time in freezer crock pot cooking, but rather do up some more freezer meals like muffins, lasagnas, pot pies, etc.  I've always wanted to have extras in the freezer to hand off to friends/family who might need it (a new arrival of a baby, a death in the family, or an illness).

Ingredients
1 pound stewing beef, cubed
4 carrots, sliced
4 red potatoes, cut into large cubes
1 package dry onion soup mix
1 can cream of mushroom soup
1 can tomato sauce
1 cup of frozen green peas or whatever you have (I tossed in some celery and corn too)

Method
Place all ingredients in a resealable gallon-sized freezer bag. Mix together and zip bag closed. When ready to eat, remove from freezer and cook in crock pot on LOW for 8 hours.

Monday, February 18, 2013

Happy Family Day!

Holla!! Happy Family Day! Canada, ya did good introducing Family Day 5 years ago.  My husband and I hosted my Mama, Bro, Sista-in-law and nephew last night for dinner, a movie and a sleepover.  We always love having a house full of people and last night was no exception.  I'm not one to want to be prepping food while people are catching up (God forbid I miss out on something!)so I made a big old patch of chili (gluten free!) ahead of time and warmed it through in time for dinner.  It was a hit!  I served it with rice and tostitos and had franks hot sauce and shredded cheese for toppings. This can be made and tossed in the freezer too.  Comfort food --- mmmm...

Chili Ingredients
2 lbs of ground beef or chicken
1 medium onion, chopped
2 garlic cloves, chopped
2 celery stalks, chopped
1 tbsp Worcestershire (*** make sure there is not wheat in it if you want gluten free)
4 tbsp chili powder
1 tbsp sugar
1/4 tsp Cayenne pepper
1/4 tsp dried oregano
1/4 tsp dried basil
1 tsp dried red pepper flakes
2 bay leaves
1 can diced tomatoes (or crushed tomatoes if you don't want tomato chunks)
1 can tomato pasta sauce
1 can kidney beans, drained and rinsed
1 can chick peas, drained and rinsed
Method
In a fry pan over medium heat, cook ground beef/chicken all the way through. Drain fat if necessary. Add onion and celery and cook 5 minutes, stirring occasionally. Add all remaining ingredients and turn heat to low.  Simmer for 1-2 hours. Remove bay leaves and serve. 

After the family left I whipped up two batches of chocolate chip bran muffins.  One for us and one for a friend who unfortunately lost a family member this weekend.  I made some healthy modifications to my regular bran muffin recipe which I am happy with.  Hope you like them too.

Yields: 1 dozen

Chocolate Chip Bran Muffin Ingredients
1 1/2 cups wheat bran
1 cup milk
1/3 cup unsweetened apple sauce
1 egg
2/3 cup brown sugar
1/2 teaspoon vanilla extract
1 cup whole wheat flour
1 1/2 teaspoons baking soda
1 1/2 teaspoons baking powder
1/2 teaspoon salt
1/2 cup raisins/blueberries/chocolate chips (optional)

Method
Preheat oven to 375 degrees. Grease muffin cups. Mix together wheat bran and milk; let stand for 10 minutes. Beat together apple sauce, egg, sugar and vanilla and add to milk/bran mixture. Sift together flour, baking soda, baking powder and salt. Stir flour mixture into milk mixture, until just blended. Fold in raisins/berries/chocolate chips and spoon batter into prepared muffin tins. Bake for 15 minutes. Cool and enjoy!

Friday, February 8, 2013

Jillian Michaels, Arsenio Hall & Pancakes

Jillian Michaels kicked my ass yesterday after work. Push ups sooooooo aren't my thing. Pizza is, but push ups certainly aren't. I found it painful to wash my hair in the shower this morning (albeit, it was a good pain). You know what made that pain go away? Finding out that SCHOOLS ARE CLOSED TODAY. Can I get a BOOYA?! You know what made that pain come crashing back? Shoveling.  Let me paint you the picture. Imagine this; Me standing at the top of my 6 car driveway fist pumping in the air (Arsenio Hall style) after an hour and a half of shoveling because I finished half of the driveway even though I was so sore. In the distance I hear a scraping sound.  Hmm, must be a neighbour shoveling. NOPE. The f'n snow plow. The guy drove by the mouth of my driveway and left only a small pile.  Cha-ching! Another fist pump to the sky. I start walking down the driveway to get started but NOOOOOOO, the plow comes to a screeching halt.  The guy backs up and plows again. Mother f'er...the pile doubled its size. Oh but wait for it ---- he backed up a third time! Why didn't we buy a snow blower again?! My arms are going to fall off right now but you know what?! It's ok, because SCHOOLS ARE CLOSED TODAY!

After I realized that it was a snow day I decided that I would make my hubby a nice breakfast before he started his trek into work.  His request; pancakes.  I used my go to recipe (here) but I made a few healthier adjustments and they turned out great!  Next time I'll try half whole wheat flour and half white flour.

Those of you who got hit with the storm, stay safe and warm and eat some pancakes! xo

Yield: 6 medium pancakes (enough to make two people FULL!!)

Ingredients3/4 cup milk
1  tablespoon white vinegar
1 cup all-purpose flour
2 tablespoons white sugar
1/2 teaspoon baking powder
1/2 teaspoon baking soda
1/2 teaspoon salt
1 egg
*butter or pam for pan
Method
Combine milk with vinegar in a medium bowl and set aside for 5 minutes to sour. Combine flour, sugar, baking powder, baking soda, and salt in a large mixing bowl. Whisk egg into soured milk. Pour the flour mixture into the wet ingredients and whisk until lumps are gone. Heat a large skillet over medium heat, and coat with cooking spray or butter. Pour 1/4 cupfuls of batter onto the skillet, and cook until bubbles appear on the surface. Flip with a spatula, and cook until browned on the other side. Serve with fresh fruit.


Sunday, January 27, 2013

Hangover Potato Soup

Borrowed from here
Last night my husband and I might have gotten carried away at my sister-in-laws Stag and Doe.  And by might I mean, we absolutely did. Once the bottle hits my lips...Anyway, our 'condition' this morning has changed from rough, to great, to so-so, back to rough in a matter of minutes.  My husband slowly dragged his feet back up stairs to bed because a delayed hangover bitch slapped him straight across the face. As I sat here staring at the TV not able to process anything on the screen I decided that soup was going to be my only saving grace today. Soup with bacon and cheese. Yes, that was going to make it all better. It only took about 30 minutes total including prep to dishes and everything in between. Now I sit here with a delish bowl of red potato soup and I'm starting to rebound for the third time today.  Typically, cream based soups are made with a shitload of butter and heavy cream but I figured the bacon and cheese would be enough so I used 1% milk and cornstarch to thicken it up. I am really happy with the results of this make shift, rushed recipe.  I adapted this recipe and also 'borrowed' their picture because I couldn't get my shit together to take a picture today. Too much effort. I will absolutely be using this recipe again. Hope you like it!

Yields: 1 large pot of soup (about 8 servings)

Ingredients
8 medium red potatoes, washed and cubed (peels on!)
1 large onion, diced (I used red but use whatever you have)
5 strips bacon, cubed
4 cups milk
2 cups water
3 chicken bouillon cubes
3 tablespoons corn starch mixed with 1/4 cup of cold water
1/2 teaspoon salt
1/2 teaspoon pepper
1/4 teaspoon garlic powder
1/2 teaspoon dried parsley
grated old cheddar cheese to garnish
sliced green onion to garnish (if you are fancy like that)

Method
Wash potatoes and cut into bit sized cubes.  Toss into a large pot and boil until tender.  In the meantime dice up onion and bacon and cook in a fry pan over medium heat until onions are translucent and bacon is cooked through.  Do not drain fat. Drain potatoes and return to large pot.  Transfer bacon and onion to potatoes and add remaining ingredients except cheese and green onion. Simmer soup for 15 minutes. If you want your soup thicker, add more cornstarch mixed with cold water to it. Serve in bowls with cheese and green onion on top. Enjoy!

Tuesday, January 22, 2013

Twice-Baked Potatoes

I promised you I'd be back to give you the inside scoop on the twice-baked potatoes I made a few nights ago for the freezer. The verdict - YUUUUUMMY! They are super easy to make and you can toss them in the freezer to use when you don't feel like cooking. My husband and I both agreed that you could easily get away with eating 1/4 of one of these since they are so filling. Your call. Umm, I should also tell you that I think I'm obsessed with freezer cooking.  I came home from work yesterday and made a ridiculously large batch of spicy sausage pasta sauce for the freezer.  There will be a lot of lazy woman freezer recipes coming your way over the next few months. You can always count on me for ways to cut corners. You.are.welcome. 

Yields: 6 halves

Ingredients
3 large baking potatoes, washed
1/4 cup butter
1/4 cup cream cheese (fat free or regular)
3 cloves garlic, minced
1/2 cup milk
1 green onions, chopped
salt & pepper
1/2 cup old Cheddar cheese, grated

Method
Lightly spray washed potatoes with cooking spray and place on a cookie sheet.  Bake for about 1 hour and 15 minutes on 350 degrees. Remove from oven. Using a serrated knife, carefully cut potatoes in half lengthwise.  Spoon out the inside of the potatoes leaving a thin layer of potato attached to the skins. In a large bowl, using an electric mixer combine potato guts, butter, cream cheese, garlic, milk, onions, salt and pepper until creamy.  Spoon back into potatoes and top with grated cheese.
If cooking immediately: Bake in oven for 15 additional minutes at 350 degrees
If freezing: Wrap tightly in plastic wrap and put into a freezer bag.
If cooking from frozen: Cover slightly with foil and bake at 350 degrees for 45 minutes. Uncover for 15 additional minutes.

BOO to the YA. 
 

Sunday, January 20, 2013

Freezer Cooking

For Christmas my ridiculously generous and thoughtful Mother bought us a stand up freezer for our basement - BOOYA!  We picked it up last weekend and I have been dreaming about what to fill it with (that's what he said) every since.  The thought of being able to buy multiples of an item when it goes on sale and tossing it in the freezer makes me more excited then it should. I know, I know. I'm a loser. Shut it. Today I scored some pretty great prices on some meat so I decided to put together 10 crock pot freezer meals that I had pinned over on my Pinterest page.  I have to say it wasn't nearly as bad as I thought it was going to be.  It took me 2 hours total, that's with prep and clean up.  I had wished to do more however I didn't plan all that well and ran out of tomato sauce.  Chicken wasn't on sale this week so I only did beef and pork meals. I'm not going to post recipes until the hubster and I actually try each of them --- that way if they are ass I can adapt the recipe I post so you guys don't end up making something nasty.  Tonight we are trying one item I made so I will keep you posted.  It wasn't for the crock pot but they do keep well in the freezer apparently.  Twice-baked potatoes -- sounded like a good side to go with chicken wings while we watch the football games on this COOOOOLD Sunday.  I will be back shortly to do a potato update. Peace out kids. 

Sunday, January 13, 2013

Green Smoothie with Oats

I mentioned a few weeks ago that I would be jumping back on my green smoothie bandwagon after my holiday bingefest. I've been back to work for a week and have had one every morning since.  The thing I love the most about these smoothies is that you can add whatever fruit your heart desires (or whatever you freezer is stocked with).  The one downfall to my smoothie recipe --- it only has 2 food groups; fruits & veggies, and dairy.  I'm a firm believe (and preacher to my students) that if you are going to eat a meal you should have at the very least, 3 food groups.  I decided to spend some time yesterday morning experimenting with my smoothie recipe and researching nutritional information to see if it would be worth it to add oats into my smoothies.  Adult females need 21+ grams of fibre a day and about 45grams of protein a day. I put together the below chart -- check it out. My opinion is that adding oats is totally worth it.  While the texture changes just slightly when oats are added the flavour doesn't at all.  Tonight I'm going premeasure my ingredients in the blender (except for the frozen fruit) and give the oats the night to soak.  I think this will make the consistency a lot smoother. (update: it didn't make a huge difference at all). I always make a double batch in the morning because my husband and I both drink them.  Here is the nutritional information and recipe for ONE serving. 
*please note that I added water to this recipe because I've added the oats


Healthy-ish Squares

My husband is a sucker for baked goods, especially if they have coconut in them so I decided to make coconut cranberry oat squares for an easy to grab snack or breakfast.  While I love to bake I hate that recipes yield enough to feed a family of 76.  These bad boys freeze well so I pre-cut them and tossed them in to freezer so we can take them out one at a time. I adapted a recipe that we use at work for my Food and Nutrition students by decreasing the amount of butter and substituting for greek yogurt.  Here it is...Enjoy!

Yield: 12 bars
Ingredients
1/3 cup soft butter
1/3 cup yogurt (I used fat free vanilla Greek yogurt)

1 cup packed brown sugar
1 egg
1 tsp. vanilla
1 ½ cups rolled oats
1 cup whole wheat flour
½ tsp baking powder
½ tsp baking soda
¼ tsp salt
½ cup slivered almonds
½ cup dried cranberries
¼ cup raisins or chopped dried apricots
½ cup sweetened shredded coconut

Method

Grease a rectangular cake pan (I used my misto!) In a large bowl using the electric mixer, beat butter with brown sugar until fluffy.  Beat in egg, yogurt and vanilla. In a separate bowl, whisk together rolled oats, flour, baking powder, baking soda and salt. Stir in almonds, cranberries, raisins /apricots and coconut. Fold flour mixture into the butter mixture. Spread evenly in the pan and bake at 350 degrees for 30 minutes. Let cool for 5 minutes before cutting into bars.

Misto

For Christmas my Mother in-law gave me a Misto and I LOVE IT! I've had my eye on one for quite some time so I am super pumped to have a misto of my own. I have used it so many times over the last few weeks and highly recommend it.  Basically what it does is turns liquids like olive oil and balsamic vinegar into a spray by pumping the lid.  I filled mine with olive oil and use it as a replacement for a bottle of PAM and adding extra oil during the cooking process.  I've used it to cook cubed chicken in a fry pan, in muffin tins, when making pancakes, homemade french fries and to grease the pan when making Shepard's pie. Booya!


Saturday, January 5, 2013

Homemade Floor Cleaner & Cleaning Schedule

A while back I made the decision to switch to all natural cleaning products and am beyond happy with my decision.  Not only am I saving mad coinage and significantly decluttered my cleaning supply cupboard but I feel such a peace of mind having zero chemicals under my sink (actually I lied - I have dishwasher tablets, which are my next mission to get ride of).  It has been a learning experience and I have spend hours upon hours reading reviews and experimenting.  It's been a slow transition, adding a new homemade product every few months (all purpose here, and endust/furniture polish here).  Today I decided to add a concentrated floor cleaning solution to my collection.  I've been holding onto an empty 'Simply Orange' juice jug because I thought I'd be able to use it for something (I'm a freak and love containers).  Today was the day!  Here is my homemade recipe I came up with after reviewing 20+ recipes and reading some reviews. This is safe for hardwood floors, tile and linoleum. Happy Cleaning!

Ingredients
5 cups pure white vinegar (or distilled vinegar)
1 1/2 cups borax
15-20 drops of essential oil - Optional (covered up the vinegar smell though. I used lemon)

Method
In a pot over high heat warm vinegar.  Slowly add borax and stir often to let it dissolve.  This should take 4 minutes, tops.  Let cool.  Pour into a leak proof jug and add essential oil. Shake.  When ready to use shake then add 1/4 cup to a bucket of warm water. Happy scrubbing.  No need to rinse floors when done. Woot woot!

My husband and I also decided that in the new year (gulp! It's here already!) that we would start to follow a cleaning schedule. I hate schedules but I hate spending 3+ hours every weekend cleaning my house far more.  I also hate that by Friday our house feels and looks dirty.  Our hope is that by following this schedule our home will always been clean and tidy and if we have any friends or family pop by unexpectedly that we won't be concerned with how gross our house is. Here is the document I put together.  Feel free to use it and adapt it to suit your family.

*for some reason blogspot isn't letting me attach files/pictures properly.  I took a screen shot of my schedule so you can see how scheduled everything.  This schedule takes about 15 minutes a day if two people are completing the tasks.  Once blogspot is up and running properly I will try to attach a file that you can alter.  Sorry folks.


Friday, January 4, 2013

Basic Quinoa Salad

I've had a cup of uncooked quinoa hanging out in my cupboard for months.  Every time I see it I think 'hmmm I should make something with that', and toss it to the back of the cupboard. A few days ago I reorganized my cupboards and found the quinoa sitting there...staring at me...all like 'you're lazy. Just make me.' Lets just say the guilt trip worked.  Now I have about 4 premade lunches. Woot woot.  You can add any of your favourite things to this salad but this is the stuff I had hanging around my house. Enjoy!

Ingredients
1 cup uncooked quinoa, rinsed thoroughly
1 1/2 cups water
dash of each cumin, garlic powder, coriander, and Cayenne pepper
1 cup corn (canned, fresh or frozen - thawed out)
1 cup black beans, rinsed
1/4 red onion, minced
1/4 cup olive oil
splash red wine vinegar
juice from 1/2 lime (or 1 teaspoon lime concentrate)
1/4 teaspoon salt
pepper to taste

Method
After thoroughly rinsing quinoa toss in a medium pot and add water, cumin, garlic powder, coriander, and Cayenne pepper.  Cover and bring to a boil over high heat.  Deduce to low and simmer for 14 minutes.  Do not open the lid!  After 14 minutes turn heat off and keep pot on burner for 10 more minutes. Do not open the lid!  After the resting time remove lid and add remaining ingredients.  Mix thoroughly.  Serve warm or chilled. Yummy!

Wednesday, January 2, 2013

Hello 2013!

Happy New Year!
 
  While I didn't write nearly as many posts in 2012 as I did in 2011 (my bad!), I had far more hits on my blog than ever before! Thanks to all of you I have had over 20,000 views since I started writing this blog.  I know that's not a lot in the grand scheme of things especially when compared to blog who get that many hits in an hour, but I am very happy that people are reading my crap and using a recipe or two from here. Thank you all for visiting and reading -- it gives me the encouragement and motivation to keep on truckin' along with this little project.
 
All the best in 2013.
xoxo 


Sunday, December 30, 2012

Turkey Soup & Shepard's Pie

Christmas has officially come to an end.  It was a long haul but we had a blast visiting with family and friends and hosting a few of our own get togethers.  We were certainly spoiled this year thanks to some extremely generous people. THANK YOU ALL!! The only thing on the agenda today is to reorganize the fridge and make some food out of all the leftovers and maybe hit the grocery store.  On the menu; turkey and rice soup, and Shepard's pie.  Both are makeshift recipes using crap I have in the kitchen so feel free to substitute as needed.  The Shepard's pie is in the freezer now so I'm not entirely sure how it turned out but it looked and smelled very good.  I've made a different Shepard's pie (here) if you want to check it out too.  Enjoy!

Turkey Soup Ingredients
8 cups stock (I made my own from turkey bones -- check out my recipe here)
1 1/2 cups cubed cooked turkey
3/4 cup long grain rice (or you can use barley)
2 carrots, diced
2 stocks celery, diced
1 onion, chopped
1/2 - 3/4 cup frozen chopped spinach
1/4 teaspoon cayenne pepper
1/2 teaspoon thyme
1/4 teaspoon basil
1/2 teaspoon salt
1/2 teaspoon pepper

Method
Toss everything into a large pot and bring to a boil.  Reduce heat to low and simmer, covered for 30 minutes or until carrots are tender.

Shepard's Pie Ingredients
3 cups garlic mashed potatoes (recipe here)
1 1/2 cups frozen corn
1 lb ground beef or chicken
3/4 cup of BBQ (I used PC gourmet BBQ sauce)
1/4 onion, chopped
1/2 teaspoon paprika
Parmesan cheese (to sprinkle of the top)

Method
In a frying pan over medium heat cook ground beef until browned all the way through.  Drain fat. Add onion and BBQ sauce and cook for 5 additional minutes.  Remove from heat and spread in the bottom of a rectangular oven safe dish.  Either on the stove top of in the microwave warm corn through. Sprinkle thawed corn over top of beef mixture.  Spread potatoes on top and sprinkle top with parm and paprika. Bake at 350 degrees for about 20 minutes.  Enjoy!

Friday, December 28, 2012

Gluten Free Appetizer - Artichoke Dip & Tostitos

Picture borrowed from here
I hope that you all had a lovely week of celebrating and spending time with family.  My husband and I have had intensely busy days and laaaaazy days --- it's all about balance, right?!  Tomorrow we are off to our last of four Christmas celebrations.  We've been binging since last Saturday and are looking forward to getting back to our regular eating routine that doesn't include turkey! I foresee a lot of spinach smoothies in the coming weeks.  My brother and his wife have generously offered to host tomorrows gathering and have taken on all of the cooking duties. CHA-CHING.  I have offered to bring an appetizer and decided on using items I have around the house out of pure laziness.  My brothers family is gluten free and I decided on a artichoke dip with tostitos (don't get the whole wheat ones if you want to do a gluten free app). I've made an artichoke dip before (here), but decided to mix it up a bit.

Ingredients
1 can artichoke hearts, drained and minced1/2 cup mayo
3/4 cup sour cream
1/4 cup Parmesan cheese
2 teaspoons lemon juice
1/4 cup cheese, grated (whatever you have laying around - I used Havarti)
1/4 cup frozen spinach, thawed, drained and minced
1/4 of an onion, minced (I used a mild Spanish onion)
1/2 teaspoon garlic powder
salt & pepper

Method
Mix it all together in a stand mixer and transfer to an oven safe dish.  bake at 400 degrees for 25 minutes or until the top is slightly browned. Remove and serve hot :)


Monday, December 24, 2012

Turkey, Mashed Potatoes & Squash

It has finally arrived!  Christmas Eve --- my favourite day of the entire year.  I'm sitting here in front of my lit Christmas tree, in my new beautiful home with a napping puppy by my side, a warm tea in hand and a heart that is so grateful that it's about to explode. As I reflect on 2012 I'm realizing that this was one of the best yet! While we did experience some difficult times including the loss of my Nana, we had many high moments including attending many weddings of loved ones, the purchase of our new home, escaping to Jamaica, celebrating our 5th wedding anniversary in Chicago, and learning that a very dear friend won her fight against cancer. Grateful indeed.

On Saturday the hubster and I hosted our very first holiday in our new place --- Christmas dinner for 47 people and 2 dogs!  It was loud, busy, hot and oh so freakin' awesome.  It was beyond heart warming to look around our home and see so much love and celebrating in one space.  We are so lucky to have so much love and support from so many people.

Today my family starts to arrive to begin the next phase of Christmas celebrating. Over the next few days I will be making turkey, mashed potatoes and squash.  Below you will find the recipes I will be using; all of which I have used previously and have been happy with). The mashed potatoes recipe can be found here, however I will be using a slightly adapted recipe today by adding some additional herbs. Here are the turkey and squash recipes. Enjoy xo

Gluten Free Turkey Ingredients (no stuffing in this bad boy!)
1 Turkey (ours is about 14 lbs -- this will feed 10 -12 people)
Juice of a lemon
Salt and pepper
2 tablespoons Olive oil
1/2 onion, peeled and quartered
1 entire thing of celery (is it called a bunch, head, bundle...hmm) Use the entire thing; leaves and all)
2 carrots, cut into 4 big chunks
1 tablespoon dried parsley
1 teaspoon rosemary
1 teaspoon thyme

Method
Thaw your bird -- about 5 hour for every pound in the fridge. Grab your rubber gloves because shit is going to get real. Remove all the gross random body parts from the inside and toss in the garbage --- please, for the love of god do not keep them for soup.  I have been scared for life from seeing my mom make `esophagus soup`. Preheat oven to 400 degrees.  Don`t forget to remove on rack. Rinse turkey in cold water and pat dry with paper towel.  Bleach the crap out of your sink because all those nasty germs can make you sick.  Using the juice from one lemon coat the inside of the bird then coat with a palm full of salt. Now the stuff that goes in the bird is for flavour only --- put half a onion, parsley, carrots, and celery. Close up the turkey cavity with either string or metal skewers. Make sure that the turkey's legs are tied together and tie a string around the turkey body to hold the wings in close. Paint bird with olive oil and sprinkle with salt, pepper, rosemary and thyme. Place in a roasting pan breast side down and cook at 325 degrees for about 3.5 hours or until a meat thermometer reads 175 degrees for dark meat and 165 degrees for the breasts.  Baste every 30 minutes. I have a needle type injector thing that I will use to inject the juices as well (That's what she said!). Juices should run clear. Remove from oven and let rest for 15 minutes before carving. ENJOY!

Yield: About 12 servings
Baked Squash Ingredients
2 butternut squash
4 tablespoons butter, melted
1/2 teaspoon salt
1/4 teaspoon ground cinnamon
1/4 teaspoon ground nutmeg
1/4 teaspoon pepper
1/4 cup brown sugar
 
Method
Cut squash in half lengthwise and get rid of the seeds. Brush squash halves with butter. In a small bowl, combine the salt, cinnamon, nutmeg pepper and brown sugar and sprinkle over squash halves.
Place in a greased baking dish. Cover with foil and bake at 350° for 60 minutes. Uncover and bake 20 additional minutes (or until squash is tender). Scoop out of skin and mash in a bowl.

 
Merry Christmas to you and your families --- enjoy every heart warming memory making moment


Sunday, December 23, 2012

Gin & Tonic Jello Shots

To celebrate the start of the holidays over 25 of our staff participate in the almost annual pub crawl on Friday night.  It was a 10 hour long beverage sipping event after a day of work and it was SO.MUCH.FUN. I took it back old school and contributed 100 different flavoured jello shots and they were a hit.  The fan favourite were the Gin and Tonic shooters. Here is the recipe I used. Enjoy!

Yield: About 15 shooters

Ingredients
1 box lime jello
1/2 cup boiling water
1/2 cup boiling tonic water
2/3 cup gin
1/3 cup cold tonic water

Method
Measure out 1/2 cup of water and 1/2 cup of Tonic. Pour the mixture into your pot and bring it to a boil. While the Water/Tonic mixture is heating up measure out 2/3 cup of gin and 1/3 cup cold tonic and set them aside. Once the tonic and water comes to a boil quickly pour it into a bowl and mix in the powdered jello. Once the powder is completely dissolved add the cold gin/tonic and stir again. Pour into disposable shot glasses (I use the large ketchup cups). CHEERS!

Hot Chocolate & Bailey's

It's hard to believe that Christmas has arrived.  I just ended school on Friday and I am so thrilled to have two weeks to regroup. The last day of school leading into the winter break is one of my favs.  The students are all so excited and there is such a strong sense of holiday spirit in the school. It also makes it socially acceptable to eat cake for breakfast and timbits for lunch which, for the record I did. On the last day of school I always like to give my work buddies a little treat so this is what I came up with.
  • Disposable coffee cup with lid (Dollar store)
  • Flavoured hot chocolate (Costco)
  • Mini bottle of Bailey's
  • Cellophane bags (Michael's)
  • I wish I included red spoons --- shoot!


*I scored the template for these cute naughty or nice gift tags here)

Saturday, December 8, 2012

4th Annual Cookie Exchange

Last night was our 4th annual cookie exchange with some amazing friends.  We scored a lot of awesome treats! I'll admit that I always regret being apart of this cookie exchange while I'm making my 7 batches of cookies but when it's all said and done and we swap everything it is completely worth it!  The 6 of us ladies always touch base ahead of time to ensure we'll have a good variety of treats. This year we had short bread, chocolate candy cane cookies, chocolate coconut macaroons, sugar cookies, truffles and peanut butter cups. CHA-CHING! I haven't yet sampled everything but it all looks delicious! My husband and I are hosting 2 Christmases this year (one will be 50+ people!!!) so I'll need to bake a few more batches of various cookies to make our stash last through the holidays.  I ended up making sugar cookies with a Hersey's kiss on top.  They turned out well for the most part but next time I will make them a tad smaller, add some nutmeg, and perhaps mix up the types of kisses I put on the top. Below is the adapted recipe. Hope you like 'em. Check out our 2nd and 3rd annual cookie exchanges here and here.

Yield: 24 cookies
Ingredients
Various Hersey's Kisses (hugs, milk chocolate, candy cane, etc)
1/2 cup butter, softened
1 cup sugar
1 1/2 teaspoons vanilla extract
1 egg
2 cups all purpose flour
1/4 teaspoon nutmeg
1/4 teaspoon salt
1/4 teaspoon baking soda
2 tablespoons milk
Red coloured sugar (put regular sugar in a Ziploc, add 5-10 drops of food colouring and shake)
 
Method
Preheat over to 350 degrees. Remove wrappers from the kisses (sample each one!). In a stand mixer, beat butter, sugar, vanilla, and egg in large bowl until well blended. In a separate bowl stir together flour, nutmeg, baking soda and salt. Add the flour mixture alternatively with the milk to butter mixture, beating until well blended. Shape dough into 1 inch balls and colored sugar. Place on ungreased cookie sheet. Bake 8-10 minutes (I did 8 -- I like my cookies chewy!)  Remove from oven and press a kiss into center of each cookie. Immediately place in the freezer and don't touch for 10 minutes. As soon as you move the tray the kisses collapse. Enjoy!

It was mighty cold outside the night I made mine so I lined them up on my deck railing to cool.

Rushed Ribs

Over the last couple of years I have learned more about myself than I have it the 10 years prior to that.  Do I dare say that I'm maturing!? Hmm, maybe that's what happens when you turn 30. Doubtful. Whatever the reason, I'll take it.  This new self awareness has helped me realized what makes me 'tick' and why I act, think and feel the way I do.  I'm not going to sit here in list all of my idiosyncrasies but I will tell you that I have learned that although I get an huge satisfaction from being organized, I HATE routine.  I've mentioned before that the very thought of meal planning gives me heart palpitations. This hangup I have can be problematic when I want to use a recipe that requires planning ahead.  I scored back ribs on sale from Foodland and had intended on dropping them in the slow cooker before running out the door for work but completely forgot. Dammit. When I got home from work at 5pm I decided to try a quick approach to making ribs.  I have to say they turned out WAY better then I thought but obviously not as fall-off-the-bone as they would have been if I'd done a slow cooking method.

Ingredients
Pork back ribs
1/2 cup ketchup
 3 tablespoons soy sauce
2 cloves garlic
1/4 cup honey
4 tablespoons brown sugar

Method
Preheat oven to 375 degrees.  Place ribs, fat side down in an oven proof dish.  Mix all ingredients together in a bowl and pour over top of the ribs.  Cover dish loosely with foil, allowing steam to escape and cook for 45 minutes.  Remove foil and cook for an additional 15 minutes. Serve with baked beans and corn. Yum!

Monday, November 19, 2012

The Classic Caesar

It's inevitable that when I hear someone ordering a Caesar or see someone sipping on one I MUST have one myself. For as long as I can remember I've always loved them.  My Father used to make virgin Caesars for me when I was little on special occasions like Christmas eve, Thanksgiving dinner or any large family get togethers. I've had Caesars at pretty much every restaurant I've been to -- some better than others.  My mouth is watering just writing about it.  I can't believe I've been writing this blog for over two years and haven't posted a recipe for a Caesar yet.  wtf. Without further ado...

Yield: 1 beverage

1 lemon wedge (use to wet the lip of the cup so rimmer sticks. Squeeze remaining amount into cup)
Caesar rimmer
4 drops Tabasco
1/4 teaspoon Worcestershire sauce
3 tablespoons dill pickle juice
2 ice cubes
1 once vodka (optional)
fill with clamato juice
top with salt and pepper
garnish with spicy pickled bean, Olive and celery

Excuse me while I go make myself a caesar...

Sunday, November 11, 2012

Natural Cleaners Round 2

A few months ago I made an all natural all purpose cleaner (found here).  So far so good! I am totally diggin' it.  It's so cheap to make that I have a bottle in every bathroom in the house so I can do I quick scrub anytime I feel like it (I know, I know - I live the life, don't I!?). While the all purpose cleaner is awesome for cleaning skins, counters and scrubbing floors I found it wasn't amazing as a furniture polish and dust grabber.  I looked up numerous recipes on line and came up with one that I thought would be best.  I just ran around the house and put it to use and I'm please to say IT'S AWESOME!  I will also use this product on my reusable microfiber floor swiffer thingy to help grab dog hair. It is super duper easy to make and completely all natural!  I also made a title cleaner and keep the scrubber right in the shower for quick and easy cleaning. I'm really happy with this mixture as well.

Homemade Endust
1 3/4 cup water
3 tablespoons olive oil
15 drops Lemon essential oil
1/4 cup white vinegar

*while you are cleaning you'll have to shake the mixture a lot since the oil separates easily.  Make sure you don't get this mixture on fabrics -- the oil will stain.

Homemade Title Scrub
1 part blue dawn dish soap
1 part white vinegar

*this will not disinfect --- it will however take away all the nasty grime! I purchased this cool little scrubber thing from the Superstore - it's awesome!

Saturday, November 3, 2012

Simple Cinnamon Muffins

The last thing I remember as I dozed off last night was saying to my husband, "We finally get to sleep in tomorrow..." Pfff, right.  My internal alarm clock woke me up at 6:08 am. Dammit. After laying in bed for an hour trying to get back to sleep I decided to tip toe downstairs.  Wowza! The first big frost of the year.  You know what that means? Christmas is coming SOON!  Cue the Christmas tunes! (j/k - I didn't actually play holiday music....yet).  It was a little chilly in here so I built a fire, made myself a warm Chai Latte and whipped together cinnamon muffins all in 10 minutes flat.  Now my butt is on the couch relaxing and I'm actually quite pleased I woke up early because it's mornings like these that make a crazy ass week completely worth it. Happy Saturday morning everyone.  Enjoy every blissful minute of it.

Yield: 8 large muffins

Ingredients
1 1/2 cups flour
2 teaspoons baking powder
3/4 teaspoon cinnamon
1/2 cup sugar
1/4 brown sugar
1/2 cup veggie oil
1/2 cup milk
1 egg, beaten

Method
Combine all dry ingredients in one bowl and all wet ingredients in another and mix. Slowly add dry ingredients to the wet ingredients. Be sure not to over mix. Using muffin liners fill 8 cups just over 3/4 full. Fill the empty cups half full with water (putting empty bakeware in the oven can be damaging to them). Bake at 375 degrees for 18-20 minutes or until a tooth pick comes out clean when you poke your muffin (that's what she said).

Since we are eating these for breakfast I'm not making icing however if you wanted to you could mix 1/4 cup powdered sugar, 1 teaspoon vanilla and 2 tablespoons of milk (or cream). Enjoy!

PS: Don't forget to change your clocks tonight!


Tuesday, October 30, 2012

Burritos

Taco, burrito, what's comin' outta your speedo?
.... Anyone? Anyone?
....SNL circa 1996
....alrighty then...

Last night I was determined to have Mexican for dinner. I had a mad craving that had to be taken care of.  Bring on the burritos baby. My husband and I could only eat one each and took the leftovers for lunch today -- chaaaa-ching! I will be making these bad boys again and again!

Yield:4 maaaaaaaaassive burritos

Ingredients
1 lb ground chicken
Splash of olive oil
1/2 tsp red pepper flakes
1/4 tsp cumin
1 tablespoon chili powder
1 can refried beans
1/4 cup water
1/2 cup salsa
1 cup cooked rice (I used basmati and threw in a 1/4 cup of salsa into the water so it could be absorbed during cooking)

Sour cream, salsa and cheese to garnish

Method
Cook rice. Set aside. In a large frying pan warm olive oil over medium heat. Add ground chicken and spices.  Cook though (until the pink is gone).  Add salsa, refried beans and water. Mix everything well and cook for about 5 minutes, or until most water has evaperated.  Remove from heat and stir in rice. Serve on large soft tortillas.  Garnish with cheese, sour cream and/or salsa.  

Buen Provecho!

Sunday, October 14, 2012

Homemade Starbucks Chai Tea Latte

Picture borrowed from here
Last summer I told you all about my addiction to Chai Tea Lattes from Starbucks.  Those bad boys run about $4.00 for a small  (oh sorry, TALL....pff, what's with those size names anyways?) so I only allow myself to purchase one every three weeks or so. I always wait for a stressful, busy day so it's even more of a treat. Am I the only loser that strategically plans their latte drinking? My thoughtful family and friends know me so well that they often give me Starbucks gift cards for my Birthday or Christmas.  I mentioned here that I found a way to make them at home using the exact same concentrate that Starbucks uses.  The bad news is the price has gone up to about $7.99 (depending on where you get it). The good news is if you cross the border to the USA you can find it at Target for $2.99!  Have you ever been so excited and flustered when you stumble across a great sale that you aren't thinking clearly, you crack under the pressure and make a quick decision that you regret later? Story.of.my.life.That was me as we crossed the border back into Canada. "Dammit, I only bought 8 cartons?! What was I thinking? I should have grabbed 20!". Next time I will enter Target with a plan -- buy an entire skid. lol. There are 2 Targets coming to London, Ontario in the new year -- I wonder how much it will cost there!? The great thing about this product is that there is a Decaf option which is a wonderful evening treat while watching TV. My sister-in-law recently found the concentrate at 'Liquidation World' in her town for $2.00! I'm sure that was just fluke so don't rely on LW to be your constant suppler but it might be worth a peek if you have one where you live.

Yield: One yummy mug full

Ingredients
Tazo Chai Tea Concentrate
Milk

Method
Fill half of your mug with the concentrate and the other half with milk.  Warm on high in your microwave for about 1.5 minutes, or until hot all the way through.  Either stir with a mini whisk or a milk frother and enjoy every heavenly sip. Yeah, I said it. Heav-en-ly. 

Saturday, October 13, 2012

Chicken Tacos

On Wednesday I had a few girlfriends over for a ladies night; an evening of catching up, eating and drinking wine. It was a great way to make the week go by a little faster.  We successfully polished off a few bottles of wine but I was left with half a bottle of white that had sat on my counter since.  I'm not a white wine drinker (university ruined it for me!) so tonight I decided to spruce up chicken tacos by simmer the onion, chicken cubes and taco seasoning in wine. I used one of those taco seasoning packets that typically call for 1 cup of water to be added with the seasoning.  Using wine instead of water made the tacos even more awesome. Worth a try if you happen to have extra wine sitting around. HA! I typically use ground chicken when I make tacos however I didn't have any on hand so I cubed up two chicken breasts. My husband and I both agree we prefer this new wine infused chicken cube approach to tacos.  I will definitely be making these again!

Want to make your own taco seasoning? Here's a simple recipe for you that I've used!

Yields enough to make one batch of tacos

 
Method
Add all ingredients to cooked chicken/beef in a skillet and add 1/2 cup of water. Simmer on low for 5 minutes or until most of the water is gone.

Banana Peanut Butter Muffins

Cha-ching! I was in the baking isle at the grocery store the other day and stumbled across a life changer! Peanut butter mini melts, which happen to be the exact cups found in the only ice cream I eat -- Loads of Chocolate Peanut Buttery Treat. Like I said; a life freakin' changer.

I spent the day paint our master bedroom and found myself bagged by 5pm.  After a long soak in the tub I decided to use the 'life changers' and make a batch of banana muffins.  So here I am curled up on the couch watching a PVR'ed episode of 'Parenthood' sampling a muffin. They are delish! So delish in fact, that I just chugged a curdled glass of milk and didn't even notice. True story. Nasty, I know but I don't even care because that muffin was epic (That's what he said). You should know that these are FAR from good for you -- so think of them more like a cupcake and enjoy every GD bite :)

Ingredients
1 cup butter, softened (or 1/4 cup butter, 3/4 cup apple sauce)
1 egg
1/2 cup white sugar
1/2 brown sugar
1 teaspoon vanilla
3 large very ripe bananas
3 tablespoons instant coffee dissolved in 2 tablespoons of hot water
2 1/4 cups flour
1/4 teaspoon salt
1 teaspoon baking powder
1 teaspoon baking soda
3/4 cup peanut butter melts (or chocolate chips if you are boring like that)

Method
Mix all wet ingredients and both types of sugars together in a stand mixer until thoroughly mixed. Slowly add dry ingredients until everything is mixed.  Spoon into a greased muffin tin and bake for 23 minutes at 350 degrees or until toothpick comes out clean when muffin is pierced (that's what she said!). Enjoy!