Sunday, June 23, 2013

Cold Oatmeal in a Jar

What the hell did we ever do before the internet?  Seriously though! I know I sound a little dramatic here, but how did people function? So far today I've used the internet to upload pictures, research the health benefits of oats and ground flaxseeds, look up recipes, chat with friends, and am now I'm writing this post. Internet, I love you. I'm dating myself here but I remember clearly in grade 8 getting into trouble from my father because I had used too many minutes on the internet that month. Oops, I was on ICQ (uh-oh!) Oh dial-up! I digress.

I purchased a large bag of ground flaxseeds yesterday (Big day eh?) to add to our green smoothies that my husband and I drink daily.  In the new year I added raw oats to my original recipe to provide additional nutrients, and another food group. With the addition of a tablespoon of ground flaxseed (which is 1/2 tablespoon each) to our mixture we will be getting a descent dose of Omega-3 fatty acid too. BOO to the YA! While researching the benefits I stumbled across a new trend that I seemed to have missed during my late night Pinterest surfing - Cold Oatmeal. Since I am all for trying out easy recipes I thought I'd give this bad boy a whirl.  I looked up a few different recipes and this is the concoction I came up with using the ingredients I have in my house.  A super easy, make ahead snack or breakfast that I will certainly use again. Since they are made in mason jars this an awesome healthy breakfast to toss in your purse on your way to work if you are running late.

Yield: 1 Jar/Serving

Ingredients
1/4 cup quick oats
1/2 cup unsweetened almond milk (or dairy milk)
1/4 banana, cubed small (toss the rest in the freezer for smoothies)
1/2 cup fresh berries (I used strawberries & raspberries)
1/2 teaspoon ground flaxseed
1/8 teaspoon cocoa powder
a sprinkling of something crunchy to add to the top in the morning (chopped almonds, pecans, granola etc.)
*if you like sweet oatmeal then sprinkle some brown sugar, maple syrup or stevia in there too.

Method
Toss everything into a mason jar, put the lid on and shake slightly.  Put in fridge overnight.  Remove from fridge, shake slightly and add your crunchy topping. Enjoy!

I've read this can stay in the fridge for up to 3 days. I also noticed that some people warm theirs in the microwave.


Saturday, June 8, 2013

Parmesan Risotto

For some reason I have always been scared shitless to make risotto. Tonight I faced my fear. (Cue dramatic music).  I've only had the pleasure of eating risotto a handful of times but have always really enjoyed it. A few nights ago while watching 'Hell's Kitchen' it occurred to me that I've never attempted it before. While grocery shopping with my husband this afternoon he suggested I try out a batch of risotto. Alright, time to give this a try.  It certainly isn't my typical lazy-girl-recipe but it was totally worth it. I will be making this again for sure.  I adapted a risotto recipe I found here.

Yield: 4 entrée sized servings

Ingredients
1½ cups Arborio rice (found in rice section)
4 ½ cups chicken stock
½ cup white wine
½ small onion, chopped
4 tablespoons butter, divided
1 tablespoon olive oil
12-24 shrimp (cooked, shelled, deveined, tails off) (optional)
1 cup fresh spinach, chopped (optional)
2 cloves garlic, minced
½ cup grated Parmesan cheese
1 tablespoon fresh parsley, chopped
salt to taste
 
Method 

In a medium saucepan over high heat bring stock to a boil then turn to low heat. In a large saucepan, heat oil and 1 tablespoon of butter over medium heat and add onion. Sauté for 2-3 minutes or until it is slightly translucent. Add rice and stir briskly with a wooden spoon to coat with oil and butter. Sauté for another minute or until there is a slightly nutty aroma. Add the wine and cook while stirring, until the liquid is fully absorbed. Add a ladle of hot stock to the rice and stir until the liquid is fully absorbed. When the rice appears almost dry, add another ladle of stock and repeat the process until the stock is gone. This should take about 20-30 minutes (ouch my arm!). If you run out of stock and the risotto still crunchy/chewy and doesn't look creamy (sort of like the look when you are making rice crispy squares), you can finish the cooking using hot water. While you are doing that toss shrimp, garlic, 1 tablespoon butter and spinach in a small frying pan. Cook over medium heat for 5 minutes, stirring often. Set aside. In the rice saucepan stir in the remaining 2 tablespoons butter, Parmesan cheese, and parsley. Pour in shrimp mixture and mix. Season to taste with salt. Serve immediately.
Note: A properly cooked risotto should form a soft, creamy mound on a dinner plate. It shouldn't run across the plate, nor should it be stiff or gluey.


Saturday, June 1, 2013

Baked Chicken Parmesan


I don't really enjoy the typical meat, potato, veggie type meal (unless it's prime rib from The Keg! mmmm!). So when I had a few chicken breast in the fridge waiting to be cooked and I wanted to try to make something different. I decided on baked chicken parmesan and it turned out great.  Super easy and not a lot of clean up at all. Next time I make this I will throw it on a bed of spaghetti squash instead of noodles, for a healthier option.


Picture borrowed from here

Ingredients
2 boneless skinless chicken breasts                                                  
1/4 cup Italian seasoned breadcrumbs
1 egg, beaten                            
1/2 cup pasta sauce                                    
1/3 cup mixture of Parmesan & mozzarella cheese, grated
 
Method

Preheat oven to 350 degrees. Dip each chicken piece into egg then coat with bread crumbs. Place into casserole dish. Bake uncovered for 25 minutes. Pour pasta sauce onto chicken and top with cheese. Bake an additional 10 minutes to melt the cheese. Serve chicken and sauce on a bed of spaghetti noodles.

Rhubarb Muffins & Rhubarb Crisp

Our rhubarb has been ready for a few weeks now but I haven't had much free time to do anything with it. This morning I made a rhubarb crisp for the freezer and two dozen rhubarb muffins. I've made rhubarb crisp before but found that it had too many steps so I altered another recipe.  I haven't tried it yet since it's in my freezer but I will keep you posted.  The muffins turned out awesome. Enjoy the weekend everyone!


Rhubarb Crisp Ingredients (Yield: 8 servings)
3/4 cup sugar
3 tablespoons cornstarch
4 cups sliced fresh rhubarb
1 cup quick-cooking
1/2 cup packed brown sugar
1/2 cup butter, melted
1/3 cup flour
1 1/2 teaspoon ground cinnamon
1/4 teaspoon nutmeg

Method
In a large bowl, combine sugar and cornstarch. Add rhubarb and toss to coat. Spoon into an 8-in. square baking dish.  In a small bowl, combine the oats, brown sugar, butter, flour and cinnamon until the mixture resembles coarse crumbs. Sprinkle over fruit. Bake at 350° for 45 minutes or until bubbly and fruit is tender.


Rhubarb Muffin Ingredients (Yield: 18-24 muffins)        


Method
Preheat the oven to 350 degrees F. In a medium bowl, stir together the flour, baking soda, baking powder and salt. In a separate bowl, beat the brown sugar, apple sauce, egg, vanilla and milk/buttermilk with an electric mixer until smooth. Pour in the dry ingredients and mix with wooden spoon until just until blended. Stir in the rhubarb. Spoon the batter into greased muffin tins, filling almost to the top. In a small bowl, stir together the melted butter, white sugar, cinnamon and nutmeg and sprinkle about 1 teaspoon of this mixture on top of each muffin. Bake about 25 minutes. Let cook before removing from pan.

Monday, May 20, 2013

Garden Time!

Happy Victoria Day, Canada! 

During the month of May I'm usually a single lady since my full-time working husband spends a lot of his free time planting on the farm. Not today! We slept in, lounged around on the deck in our PJ's and had breakfast, hit the beach for lunch and did some much needed yard work this afternoon. My husband has been working his buns off on our new vegetable garden over the last few weeks and it's coming just about done.  We moved here last April and decided to skip planting a garden until we knew exactly where we wanted it and how big to make it.  We quickly realized that our challenge with a new vegetable garden would be the wildlife. Rabbits and squirrels and deer, OH MY!  We put up a chicken wire fence in hopes that will deter them.  Time will tell. We are looking forward to yummy home grown veggies this summer like we used to enjoy at our old place (seen here). Our old garden was so big that it was almost unmanageable (That's what she said).  This time around we are going to do a garden that isn't so overwhelming.  The rhubarb plants were here already so we worked around those.  My husband and I decided on the following crops for this year; sweet corn, spinach, romaine lettuce, green beans, peas, carrots, potatoes, asparagus (which will take a few years to yield anything), red peppers, red onions and tomatoes. Everything except the tomatoes were purchased from a local family owned farm market.  The tomato plants were purchased from a local supplier, 'The Tomato Patch' who caries 30 different types of unique and rare heirloom and open pollinated tomato plants (check them out here). I can't wait to see how the crops turn out -- hopefully the rabbits, squirrels and deer go easy...


Garden is to the right, behind the shed


This was a tiny garden and my hubby tripled the size!


Sunday, May 12, 2013

HMD

Happy Mother's Day
to all of my Mommy friends, my Mother-In-Law
and my beautiful Mother!
 
Life is so much sweeter with all of you in it! 
You deserve to have a restful day filled with a ton of love. Enjoy!
 

Tuesday, May 7, 2013

One of those days...

Ever have one of those days where you feel the need to punch everyone between the eyes for no apparent reason? Yeah, me neither.....

I'm determined to get myself in a better mood. My awesome husband is turning another year older tomorrow and I want to try to make his day as special as possible. He is at soccer tonight so I decided to whip up a batch of muffins for him to have for breakfast tomorrow morning. Being in the kitchen is so therapeutic for me (Doing dishes is not!) A while ago I made a list of things that make me feel better. I tried many of these pick-me-ups throughout the day that certainly helped.


  • A Starbucks beverage of any sort    And it was free!!  BOOYA!
  • Snail mail
  • A compliment from a stranger (or student!)
  • My family! Talked with Mama tonight!
  • A pep talk from a good friend Skyped with a far away friend
  • Going out for dinner with my husband
  • Candles Have one lit right now
  • Going on a walk with my pup Done!
  • Will Farrell movies
  • Flowers Picked some from my garden tonight
  • Text messages in the middle of the day text with my brother xo
  • A dirty joke
  • Red wine
  • Music I always have music playing - in the car, shower, kitchen, on walks...
  • cooking Muffins; check!

  • Here is the recipe I used -- it's one I've posted on here before.  Don't eat too many of these since there is a lot of wheat bran in them and, well, you know....


    Yields: 1 dozen

    Chocolate Chip Bran Muffin Ingredients
    1 1/2 cups wheat bran
    1 cup milk
    1/3 cup unsweetened apple sauce
    1 egg
    2/3 cup brown sugar
    1/2 teaspoon vanilla extract
    1 cup whole wheat flour
    1 1/2 teaspoons baking soda
    1 1/2 teaspoons baking powder
    1/2 teaspoon salt
    1/2 cup raisins/blueberries/chocolate chips (optional)

    Method
    Preheat oven to 375 degrees. Grease muffin cups. Mix together wheat bran and milk; let stand for 10 minutes. Beat together apple sauce, egg, sugar and vanilla and add to milk/bran mixture. Sift together flour, baking soda, baking powder and salt. Stir flour mixture into milk mixture, until just blended. Fold in raisins/berries/chocolate chips and spoon batter into prepared muffin tins. Bake for 15 minutes. Cool and enjoy! 


    Tuesday, April 30, 2013

    Mustache Baby Shower


    Last weekend I celebrated the upcoming arrival of my very dear friends son with some pretty awesome ladies. I hosted a baby shower at my Mamas house (with a ton of help from my mother) since most of the guests were from that area. I haven't had much free time lately so I needed to make sure the shower was planned efficiently and had to come up with simple decor and food ideas that could travel well. Thank you Pinterest! Since we knew the baby was a lil' man I decided to run with that idea.  Mustache theme it was! My girlfriend loves milk and cookies so I though a milk and cookie bar would be simple, yet yummy.  I hate preparing food while entertaining so everything on the menu was prepared ahead of time so I was able to spend the afternoon socializing. 

    The Menu
    Tuna & Egg salad sandwiches
    Olive & pickle tray
    cheese & crackers
    Veggies & dip in a cup
    Double stuffed oreos
    Assorted cookies (homemade & from a bakery)
    Timbits
    Punch
    Strawberry milk
    Chocolate milk
    Regular milk


    I can't wait to meet this lil' man!!!!

    Wednesday, April 24, 2013

    Glories Sweet Potato Chips

    Me like some crunch in my snack.  I think that's why I prefer salty over sweet snacks. I should mention that my husband HATES crunching.  This is problem when we are curled up watching a movie. crunch. crunch. crunch.  Poor hubby.  Anyways, I was at Bulk Barn today after work and walked the isles checking out all the cool products they sell and I stumbled across these bad boys.
    Buy them. You won't be disappointed.  Don't be mistaken, they aren't healthy in the least but they are a great treat to crunch on when relaxing on the couch.  Just for fun, try to score their Wednesday Seniors discount and see what they say. I tried. No luck. Dammit.

    Sunday, April 21, 2013

    Cream Cheese & Red Pepper Jelly

    This weekend we traveled to the Peterborough area to visit with friends and have a good time. Mission Accomplished.  Our lovely hosts treated us very, very well. We were requested to bring an easy late night snack/appetizer and since we were traveling from quite a distance I wanted to bring something that could travel well and was super easy to prepare.  This isn't a recipe but rather a appetizer suggestion that has never failed me and is perfect in a pinch. After a few beverages last night my husband and I were chatting in the kitchen of my friends home and he said to me as he took a bite of the appetizer 'we' brought, "God this is good! Do you know who brought it?". Classic.

    Ingredients
    1 brick low fat cream cheese
    1 jar red pepper jelly
    A variety of crackers

    Method
    Remove cream cheese from fridge at least a 1/2 hour before serving to ensure it's easy to spread.  Place on a serving plate and pour red pepper jelly on top.  Fill the remainder of the plate with crackers. Enjoy!

    Sunday, April 14, 2013

    Yummy French Onion Soup

    French onion soup has got to be one of my favourite soups ever.  There is something so comforting about it.  Today I made a huge batch that will last us for at least 4 more servings.  I've written a french onion soup recipe on here before but I have to say this one was much tastier.  For some reason when you add wine to dishes they taste SO.MUCH.BETTER. Last night I used white wine in the mussels and tonight it was red wine in french onion soup.  My husband isn't much of a wine drinker (GASP!) so I find that I often have leftover wine.  I've been freezing it in 1/2 cup servings and it has come in so handy.  Here is the yummy recipe.  Enjoy!

    Yield: 6+ servings
    Ingredients
    3 tablespoons butter
    2 large Spanish onions, quartered and thinly sliced
    1/2 teaspoon salt
    1/2 teaspoon dried thyme
    1/2 teaspoon black pepper
    1/4 cup flour
    8 cups beef broth (I used 8 cups water & 4 beef bouillon cubes)
    1 cup red wine
    1 bay leaf
    Mozzarella cheese to top
    French bread

    Method
    In a large soup pot melt butter over medium heat. Add onions, salt, pepper and thyme and cook about 25 minutes, stirring occasionally. Stir in flour and cook 2 minutes, stirring constantly. Stir in remaining ingredients. Cover and simmer about 30 minutes. Remove bay leaf and transfer to broiler safe bowls. Preheat broiler. Top bowls with french bread slices and cheese (mozza is best). Place bowls on baking sheet and broil until cheese is bubbly. about 3 minutes. Remove and serve. So f'n good.

    Mussels & Baked Garlic Shrimp

    Picture borrowed from here
    Last night my Mama came for a sleepover so I decided to make a meal that she loves but doesn't have very often -- mussels. I also made a giant Caesar salad and baked garlic shrimp.  It was all delish!  It smelled like a garlic factory in here; just the way I like it.  I've posted recipes on here for both mussels and baked garlic shrimp but last night I altered them and am so happy with the turn out. I hope you like them as much as we did.  Enjoy!

    Yield: 2 servings (as a meal)
    Mussel Ingredients
    2 - 2 1/2 lbs fresh mussels, scrubbed and debearded
    1 onion, chopped
    4 garlic cloves, chopped
    3 tablespoons butter
    1 cup white wine
    2 large tomatoes, chopped
    freshly ground pepper, to taste
    1/4 cup  fresh parsley, chopped (or 1 teaspoon dried parsley)
     
    Method
    Wash mussels in cold water.  Discard any mussels are don't close in the cold water. Over medium heat cook the onion, garlic and the butter until the onions are soft.  Add in the white wine, parsley, tomatoes, ground pepper and cook for 5 minutes. Turn to high heat and add mussels. Cook covered for about 5 minutes or until all the mussels have opened. Discard any mussels that did not open. Serve in a bowl with a fresh french bread.


    Yield: 2 servings
    Baked Garlic Shrimp Ingredients12 shrimp, cooked, devained, tails off
    3 tablespoons butter
    2 cloves garlic, minced
    1/8 teaspoon oregano
    1/8 teaspoon basil
    1/8 teaspoon thyme
    1/8 teaspoon paprika
    1/8 teaspoon black pepper
    1/2 cup grated cheese (whatever cheese you have. I always mix cheeses together)

    Method
    Place one shrimp in each of the sections of an escargot baking dish. Melt butter in the microwave. Add garlic, oregano, basil, thyme, paprika and pepper to butter and mix.  Pour butter mixture equally over shrimp. Cover with cheese. Bake at 400 degrees for 10 minutes or until cheese is melted. Put on HI broil for 2 minutes to crisp up top of cheese. Serve with french bread for dipping.

    Wednesday, April 10, 2013

    Sunday, April 7, 2013

    Homemade All-Natural Hand Soap

    Are you sick of me writing about homemade cleaners yet? If so you should probably skip over this post. My sister-in-law knows I'm into natural products and gave me a bottle of Methods foaming hand soap in my stocking this year at Christmas.  It lasted me three months and I loved it! I was just about to toss the bottle out and realized the label peeled right off leaving me with a plain cute bottle. Hmm. This got me thinking, maybe I could use this bottle to make my own foaming soap.  I've made homemade hand soap but never considered putting it into a foaming bottle. SUCCESS! I'm so pumped right now. Get it?! Pumped. Har-har.  I bought a huge bottle of castile soap 9 months ago (mentioned here) and still have over half a bottle left. I looked up a few recipes online for foaming hand soap and settled on this one.  It's GREAT and works out to be about $1.00 per bottle to make. Me likie.

    *Update: We've been using this soap for a well over a month and we absolutely love it.  I won't be purchasing hand soap every again (unless it's for the bottle!).  I warn you that tea tree scene is strong the first day but complete dissipates after that. 


    Ingredients
    1 foaming soap bottle
    water
    castile soap (I used Lavender)
    tea tree oil


    Method
    Fill 1/3 of your bottle with castile soap. Put about 10 drops of tea tree oil and and fill the remainder of the bottle with water. Voila!

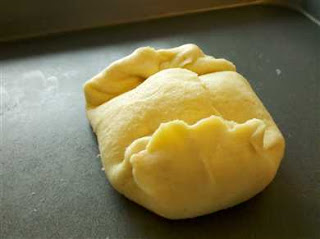
    Apple Pie Pockets

    I try to avoid baking because my husband and I end up eating entire batches to ourselves.  I know I can toss leftovers in the freezer but lets be honest, we'd just end up eating frozen cookies.  Today is a hang -round-the-house-and-get-shit-done day so I told my husband I'd make any baked good that he wanted. I barely got the offer out and he said 'apple pie'. Alrightly then.  I wasn't going to slave away and make homemade pie crust so I decided on individual pie pockets using puff pastry that has been hanging around my freezer for a few months.  These little guys turned out great! Super easy and cute (that's what he said).

    Yield: 6 servings/individual pockets

    Ingredients
    1 square or roll of puff pastry
    1 large apple (or 2 small), peeled and sliced into small cubes
    1/3 cupbrown sugar
    2 teaspoons flour
    1 teaspoon lemon juice
    1 teaspoon cinnamon
    1/8 teaspoon nutmeg
    1 egg, beaten

    Method
    Thaw puff pastry for two hours at room temperature. Peel, core and chop apples up into little cubes. Combine apples with sugar, flour, lemon juice, cinnamon and nutmeg. Preheat oven to 400F. Flour surface lightly and roll out your puff pastry as big as possible in a square shape. Cut pastry sheet into 12 3x3 squares. Place about 2 tablespoons of apple mixture on each square. Place second pastry square on top form a pocket. Press down the edge with fingers to seal and then press with fork to decorate the edges. Brush top with egg and sprinkle with sugar. Using a fork, pierce top of each square. Place on ungreased cookie sheet. Bake for 20-23 minutes. Enjoy!

    Monday, April 1, 2013

    Spam

    ...and I'm not talking about the canned meat.  It appears that I've been hit with a lot of spam in the form of odd comments on my blog and I had no idea until now.  It has apparently been happening for months so I've had to beef up my security on here.  If you've read any weird comments that include porn links ignore them.....or not. Whatever floats your boat.  I've tried my best to delete all of them, or save them to my 'favourites' so I hope my cooking blog is back to it's clean old self. Maybe it's all the 'that's what she said' lines I use. hmm...

    So back to the canned meat. Has anyone ever tried spam before?...

    Caribbean Sunset Soup

    My homeboy
    When I cook I usually google things like "recipes with sweet potato" and review about 5 recipes to come up with a plan, which usually consists of a combo of a few recipes.  I don't like following recipes -- I find them restrictive.  This sometimes gets me into trouble, with final products that are epic fails. However more often than not it turns out great and it helps me use up ingredients that I have laying around my house without having to run out to the grocery store to grab one stupid ingredient because we all know how much I love grocery shopping. Every now and then I rip out recipes from magazines that I think sound delish.  I toss them in my junk drawer never to be seen again.  Today when I was riffling around the drawer for a pen I came across a pile of recipes collecting dust.  Dammit. I have the day off today and little to do so there was no excuse. Time to use one of them. I picked a recipe that I knew I had most ingredients for and substituted the rest. I settled on Caribbean Sunset Soup from Fresh Juice, a fantastic free magazine that we get in the mail because we are President's Choice customers. Thanks to you, Galen Weston Jr. my house smells yummy!  Here is my adaptation of the recipe.
    Ingredients
    1 tablespoon olive oil
    2 large sweet potatoes, peeled & cubed
    1 large onion, chopped
    3 cloves garlic, minced
    3 cups veggie or chicken stock
    3/4 of a tin of light coconut milk
    juice of 1 lime, a the zest of half
    1/4 teaspoon black pepper
    1/4 coriander (it called for fresh cilantro to garnish but that stuff makes me ralph)
    1 teaspoon mild Indian curry paste (*I didn't have this so I used 1/2 teaspoon dried hot pepper flakes, 1/4 teaspoon turmeric, 2 teaspoons garam masala,1 1/2 tablespoons fresh ginger)

    Method
    In a large soup pot over medium heat warm oil and toss in garlic, onion and all the spices. Cook for about 4 minutes or until onions turn translucent. Add cubed potatoes and stock and bring to a boil.  Cover and simmer for 20 minutes or until potatoes are tender.  Transfer to a food processor and puree.  Return back to the pot.  Over low heat slowly stir in the coconut milk, the juice from 1 lime and a little of the zest. Stir and serve with triangles of warm naan bread.

    Thursday, March 28, 2013

    Happy Easter

    Happy Easter!
     
     
    Enjoy the long weekend. Surround yourself with good people and good food.


    Monday, March 25, 2013

    Homemade Dishwasher Detergent

    Only a few more products to go and this house will be au naturel.  This afternoon I said buh-bye to the expensive Finish Powerball Dishwasher Tablets that I've used for years.  Don't get me wrong, they work so well however those bad boys will run you about $8.00+ for a 25 pack and who knows that type of chemical crap is going down the drain.  I just made a huge batch of homemade dishwasher detergent and it worked out to be about $0.12 a load. Can I get a BOOYA!?! It was super duper easy and only took about 4 minutes to make.  Amaze-balls.

    *Update: I ran 1 load using 1 tablespoon and it sucked.  I tried again today and used 2 tablespoons and it was pretty good. Not as spectacular as the Finish tablets I usually use. It left some water spots so I'm going to take the advice of some other bloggers and add a splash of white vinegar in the bottle of the dishwasher before running it next time.

    *Update #2: I decided that this recipe is a bust.  It works best when you use at least 2 tablespoons with a splash of vinegar but the cost savings wasn't enough as I'd like so I have converted back to my power ball detergent tablets. There are a few commercial household products that I cannot seem to face getting rid of, and this is one of them.

    Yield: 50+ loads

    Ingredients
    2 cups borax (laundry isle)
    2 cups washing soda (laundry isle)
    2 cups Epsom salt (personal care isle with bubble bath)
    1/2 cup citric acid (this is hard to find this time of year.  Bulk Barn carries it year round)
    1 of those silica gel packets you get in shoe boxes or vitamin bottles (this keeps it from clumping)

    Method
    In a large bowl mix everything together (except the gel packet).  Pour into an air tights container and put the silica gel packet on top.  Put 2 tablespoons of powder for each load of dishes.  If you have hard water apparently you can put a splash of vinegar in the bottom of the dishwasher.


    Sunday, March 24, 2013

    Pear & Brie Wrapped in Crescent Rolls

    I'm not just saying that either. Cubed, sliced, melted -- I'll eat it any way it's given to me (that's what she said).  It's a bad habit. The only cheese that I don't like is blue cheese.  (Side note: Don't ever order Spicy Buffalo Chicken Pizza from Boston Pizza -- it has blue cheese and tastes like vomit).  For a treat every once in a while I bring home a small wheel of brie cheese.  I shouldn't but I do. It usually disappears fairly quickly however a few weeks ago I found that I had a half wheel left over and it needed to be used up asap or it was going to go be tossed (gasp! That can't happen!).  I made a rare purchase of Pillsbury crescent rolls at the grocery store to use with the leftover brie. I wrapped sliced pear and the leftover brie in the rolls. It was delish!  They were ridiculously easy to make and amazing for breakfast with a mug of coffee. I have some puff pastry in my freezer that I'd like to do this with next time I need to take an appetizer somewhere. mmmmm......

    
    Forgot to take a picture but this is what they looked like (sortta!)
    Pic borrow from here
    Ingredients
    1 package of Pillsbury crescent rolls
    2 ripe pears, thinly sliced
    1/2 small wheel of brie cheese, thinly sliced
    a pinch of nutmeg

    Method
    Preheat oven to 375F. Unroll and separate out each dough triangle.  On each triangle place two sliced of pear and 1 slice of brie, sprinkle lightly with nutmeg and wrap dough around.  I didn't create the crescent roll shape but rather made sure the pear and cheese was sealed inside the dough so it wouldn't ooze out everywhere.  Place on a parchment paper lined cookie sheet and bake for about 12 minutes, or until the dough turns golden.  Serve warm.

    Thursday, March 21, 2013

    Broccoli Bites & No Damn Jerk Sauce


    We are home from our amazing 5-day vacation in Jamaica and are feeling well rested, re-energized, and more than a few pounds heavier.  We had a great time away and spent some much need down time on the beach, tuned out and livin' the dream.  We experienced quite the adventure en route home which eventually lead us to having our bags searched and our beloved jerk chicken sauce confiscated at security. Long story short, I'm destine to be without jerk chicken sauce. Thankfully and fellow foodie colleague of mine has agreed to hand over his rumoured amazing recipe to me.  Fingers crossed.

    One of the challenges of preparing for a vacation is working on emptying your fridge out as best you can before you hit the road to avoid wasting food.  We were scheduled to head to Detroit after lunch on Saturday and I knew I had an entire head of broccoli I needed to use up.  I stumbled across a broccoli bites recipe here and thought they would be tasty served with a bowl of soup.  I adapted the recipe a bit and they turned out pretty good! I dipped mine in ranch dressing while the hubster dipped in franks hot sauce. Yummy!

    Yield: 8-10 patties

    Ingredients
    1 large head broccoli, cut into small-medium pieces and steamed
    1 cup of grated cheddar cheese
    2 tablespoons minced onion
    3 eggs
    1 cup of seasoned Italian breadcrumbs or plain breadcrumbs
    1/4 teaspoon of each basil, oregano, thyme, parsley, garlic powder
    salt & pepper

    Method
    Mix all the ingredients together in a large bowl. With your hands, form small patties (about the size of slidder burgers) and lay on a parchment lined baking sheet. Flatten slightly. Bake at 375F for 25 minutes, turning the patties after the first 15 minutes. Let cool and enjoy!


    Picture borrowed from here

    Saturday, March 2, 2013

    Ya Mon!

    Remember last March when I had a pretty unhealthy obsession with trying to create a jerk chicken recipe (proof; here, here, and here).  Well, the obsession has come to a whole new level.  My husband and I have planned to return to Jamaica again this March Break and I am determined to find an amazing recipe (or bottle of sauce) to bring home with me to enjoy when we are going through vacation detox.  I will keep you posted.  Not that you  actually care.  I'm pretty sure I'm the only person who gives two shits about the jerk chicken. Ah well, bring on the beach, drinks, sunshine and jerk chicken BABY...I mean Mon. Ya Mon. Ok wow, I'm out.


    Mason Jars

    A while ago I posted about organization here. I'm definitely not the most organized person but I have come up with yet another system that seems to work for me.  Enter; mason jars. My brother and sister-in-law were looking to get rid of a whole bunch of these guys and I decided to take them off their hands.  I have a ton of different baking ingredients on hand and the clutter and mismatched containers were driving me bonkers.  Thanks to my label maker (have I mentioned I LOVE my label maker!?) and an assortment of different sized mason jars my baking shelf is much more efficient.  My plan is to go to bulk barn to refill my missing ingredients so I don't have the packaging to contend with and I only purchase enough to fill the jar again. Check it. Booya!
    Phone photo -- damn, I need an iphone!

    Freezer Cooking - Beef Stew

    Pic taken with my phone -- poor quality
    A few weeks ago I posted about a batch of freezer cooking I did.  I've eaten three meals so far and I wasn't at all happy with one of them.  I ended up throwing half of it out because it was so Blah!  It was Pineapple Pork Tenderloin.  A chili recipe I used was alright, but it was pretty over cooked.  I won't even bother sharing either of those recipes because they totally weren't worth the work.  My classic chili recipe is far better.  I still have a few more meals to sample so I will keep you posted on how yummy/nasty they are. A recipe I actually liked was beef stew. It made enough for 6 large servings.  I'm not sure that I'll invest more time in freezer crock pot cooking, but rather do up some more freezer meals like muffins, lasagnas, pot pies, etc.  I've always wanted to have extras in the freezer to hand off to friends/family who might need it (a new arrival of a baby, a death in the family, or an illness).

    Ingredients
    1 pound stewing beef, cubed
    4 carrots, sliced
    4 red potatoes, cut into large cubes
    1 package dry onion soup mix
    1 can cream of mushroom soup
    1 can tomato sauce
    1 cup of frozen green peas or whatever you have (I tossed in some celery and corn too)

    Method
    Place all ingredients in a resealable gallon-sized freezer bag. Mix together and zip bag closed. When ready to eat, remove from freezer and cook in crock pot on LOW for 8 hours.

    Monday, February 18, 2013

    Happy Family Day!

    Holla!! Happy Family Day! Canada, ya did good introducing Family Day 5 years ago.  My husband and I hosted my Mama, Bro, Sista-in-law and nephew last night for dinner, a movie and a sleepover.  We always love having a house full of people and last night was no exception.  I'm not one to want to be prepping food while people are catching up (God forbid I miss out on something!)so I made a big old patch of chili (gluten free!) ahead of time and warmed it through in time for dinner.  It was a hit!  I served it with rice and tostitos and had franks hot sauce and shredded cheese for toppings. This can be made and tossed in the freezer too.  Comfort food --- mmmm...

    Chili Ingredients
    2 lbs of ground beef or chicken
    1 medium onion, chopped
    2 garlic cloves, chopped
    2 celery stalks, chopped
    1 tbsp Worcestershire (*** make sure there is not wheat in it if you want gluten free)
    4 tbsp chili powder
    1 tbsp sugar
    1/4 tsp Cayenne pepper
    1/4 tsp dried oregano
    1/4 tsp dried basil
    1 tsp dried red pepper flakes
    2 bay leaves
    1 can diced tomatoes (or crushed tomatoes if you don't want tomato chunks)
    1 can tomato pasta sauce
    1 can kidney beans, drained and rinsed
    1 can chick peas, drained and rinsed
    Method
    In a fry pan over medium heat, cook ground beef/chicken all the way through. Drain fat if necessary. Add onion and celery and cook 5 minutes, stirring occasionally. Add all remaining ingredients and turn heat to low.  Simmer for 1-2 hours. Remove bay leaves and serve. 

    After the family left I whipped up two batches of chocolate chip bran muffins.  One for us and one for a friend who unfortunately lost a family member this weekend.  I made some healthy modifications to my regular bran muffin recipe which I am happy with.  Hope you like them too.

    Yields: 1 dozen

    Chocolate Chip Bran Muffin Ingredients
    1 1/2 cups wheat bran
    1 cup milk
    1/3 cup unsweetened apple sauce
    1 egg
    2/3 cup brown sugar
    1/2 teaspoon vanilla extract
    1 cup whole wheat flour
    1 1/2 teaspoons baking soda
    1 1/2 teaspoons baking powder
    1/2 teaspoon salt
    1/2 cup raisins/blueberries/chocolate chips (optional)

    Method
    Preheat oven to 375 degrees. Grease muffin cups. Mix together wheat bran and milk; let stand for 10 minutes. Beat together apple sauce, egg, sugar and vanilla and add to milk/bran mixture. Sift together flour, baking soda, baking powder and salt. Stir flour mixture into milk mixture, until just blended. Fold in raisins/berries/chocolate chips and spoon batter into prepared muffin tins. Bake for 15 minutes. Cool and enjoy!

    Friday, February 8, 2013

    Jillian Michaels, Arsenio Hall & Pancakes

    Jillian Michaels kicked my ass yesterday after work. Push ups sooooooo aren't my thing. Pizza is, but push ups certainly aren't. I found it painful to wash my hair in the shower this morning (albeit, it was a good pain). You know what made that pain go away? Finding out that SCHOOLS ARE CLOSED TODAY. Can I get a BOOYA?! You know what made that pain come crashing back? Shoveling.  Let me paint you the picture. Imagine this; Me standing at the top of my 6 car driveway fist pumping in the air (Arsenio Hall style) after an hour and a half of shoveling because I finished half of the driveway even though I was so sore. In the distance I hear a scraping sound.  Hmm, must be a neighbour shoveling. NOPE. The f'n snow plow. The guy drove by the mouth of my driveway and left only a small pile.  Cha-ching! Another fist pump to the sky. I start walking down the driveway to get started but NOOOOOOO, the plow comes to a screeching halt.  The guy backs up and plows again. Mother f'er...the pile doubled its size. Oh but wait for it ---- he backed up a third time! Why didn't we buy a snow blower again?! My arms are going to fall off right now but you know what?! It's ok, because SCHOOLS ARE CLOSED TODAY!

    After I realized that it was a snow day I decided that I would make my hubby a nice breakfast before he started his trek into work.  His request; pancakes.  I used my go to recipe (here) but I made a few healthier adjustments and they turned out great!  Next time I'll try half whole wheat flour and half white flour.

    Those of you who got hit with the storm, stay safe and warm and eat some pancakes! xo

    Yield: 6 medium pancakes (enough to make two people FULL!!)

    Ingredients3/4 cup milk
    1  tablespoon white vinegar
    1 cup all-purpose flour
    2 tablespoons white sugar
    1/2 teaspoon baking powder
    1/2 teaspoon baking soda
    1/2 teaspoon salt
    1 egg
    *butter or pam for pan
    Method
    Combine milk with vinegar in a medium bowl and set aside for 5 minutes to sour. Combine flour, sugar, baking powder, baking soda, and salt in a large mixing bowl. Whisk egg into soured milk. Pour the flour mixture into the wet ingredients and whisk until lumps are gone. Heat a large skillet over medium heat, and coat with cooking spray or butter. Pour 1/4 cupfuls of batter onto the skillet, and cook until bubbles appear on the surface. Flip with a spatula, and cook until browned on the other side. Serve with fresh fruit.


    Sunday, January 27, 2013

    Hangover Potato Soup

    Borrowed from here
    Last night my husband and I might have gotten carried away at my sister-in-laws Stag and Doe.  And by might I mean, we absolutely did. Once the bottle hits my lips...Anyway, our 'condition' this morning has changed from rough, to great, to so-so, back to rough in a matter of minutes.  My husband slowly dragged his feet back up stairs to bed because a delayed hangover bitch slapped him straight across the face. As I sat here staring at the TV not able to process anything on the screen I decided that soup was going to be my only saving grace today. Soup with bacon and cheese. Yes, that was going to make it all better. It only took about 30 minutes total including prep to dishes and everything in between. Now I sit here with a delish bowl of red potato soup and I'm starting to rebound for the third time today.  Typically, cream based soups are made with a shitload of butter and heavy cream but I figured the bacon and cheese would be enough so I used 1% milk and cornstarch to thicken it up. I am really happy with the results of this make shift, rushed recipe.  I adapted this recipe and also 'borrowed' their picture because I couldn't get my shit together to take a picture today. Too much effort. I will absolutely be using this recipe again. Hope you like it!

    Yields: 1 large pot of soup (about 8 servings)

    Ingredients
    8 medium red potatoes, washed and cubed (peels on!)
    1 large onion, diced (I used red but use whatever you have)
    5 strips bacon, cubed
    4 cups milk
    2 cups water
    3 chicken bouillon cubes
    3 tablespoons corn starch mixed with 1/4 cup of cold water
    1/2 teaspoon salt
    1/2 teaspoon pepper
    1/4 teaspoon garlic powder
    1/2 teaspoon dried parsley
    grated old cheddar cheese to garnish
    sliced green onion to garnish (if you are fancy like that)

    Method
    Wash potatoes and cut into bit sized cubes.  Toss into a large pot and boil until tender.  In the meantime dice up onion and bacon and cook in a fry pan over medium heat until onions are translucent and bacon is cooked through.  Do not drain fat. Drain potatoes and return to large pot.  Transfer bacon and onion to potatoes and add remaining ingredients except cheese and green onion. Simmer soup for 15 minutes. If you want your soup thicker, add more cornstarch mixed with cold water to it. Serve in bowls with cheese and green onion on top. Enjoy!

    Tuesday, January 22, 2013

    Twice-Baked Potatoes

    I promised you I'd be back to give you the inside scoop on the twice-baked potatoes I made a few nights ago for the freezer. The verdict - YUUUUUMMY! They are super easy to make and you can toss them in the freezer to use when you don't feel like cooking. My husband and I both agreed that you could easily get away with eating 1/4 of one of these since they are so filling. Your call. Umm, I should also tell you that I think I'm obsessed with freezer cooking.  I came home from work yesterday and made a ridiculously large batch of spicy sausage pasta sauce for the freezer.  There will be a lot of lazy woman freezer recipes coming your way over the next few months. You can always count on me for ways to cut corners. You.are.welcome. 

    Yields: 6 halves

    Ingredients
    3 large baking potatoes, washed
    1/4 cup butter
    1/4 cup cream cheese (fat free or regular)
    3 cloves garlic, minced
    1/2 cup milk
    1 green onions, chopped
    salt & pepper
    1/2 cup old Cheddar cheese, grated

    Method
    Lightly spray washed potatoes with cooking spray and place on a cookie sheet.  Bake for about 1 hour and 15 minutes on 350 degrees. Remove from oven. Using a serrated knife, carefully cut potatoes in half lengthwise.  Spoon out the inside of the potatoes leaving a thin layer of potato attached to the skins. In a large bowl, using an electric mixer combine potato guts, butter, cream cheese, garlic, milk, onions, salt and pepper until creamy.  Spoon back into potatoes and top with grated cheese.
    If cooking immediately: Bake in oven for 15 additional minutes at 350 degrees
    If freezing: Wrap tightly in plastic wrap and put into a freezer bag.
    If cooking from frozen: Cover slightly with foil and bake at 350 degrees for 45 minutes. Uncover for 15 additional minutes.

    BOO to the YA. 
     

    Sunday, January 20, 2013

    Freezer Cooking

    For Christmas my ridiculously generous and thoughtful Mother bought us a stand up freezer for our basement - BOOYA!  We picked it up last weekend and I have been dreaming about what to fill it with (that's what he said) every since.  The thought of being able to buy multiples of an item when it goes on sale and tossing it in the freezer makes me more excited then it should. I know, I know. I'm a loser. Shut it. Today I scored some pretty great prices on some meat so I decided to put together 10 crock pot freezer meals that I had pinned over on my Pinterest page.  I have to say it wasn't nearly as bad as I thought it was going to be.  It took me 2 hours total, that's with prep and clean up.  I had wished to do more however I didn't plan all that well and ran out of tomato sauce.  Chicken wasn't on sale this week so I only did beef and pork meals. I'm not going to post recipes until the hubster and I actually try each of them --- that way if they are ass I can adapt the recipe I post so you guys don't end up making something nasty.  Tonight we are trying one item I made so I will keep you posted.  It wasn't for the crock pot but they do keep well in the freezer apparently.  Twice-baked potatoes -- sounded like a good side to go with chicken wings while we watch the football games on this COOOOOLD Sunday.  I will be back shortly to do a potato update. Peace out kids. 

    Sunday, January 13, 2013

    Green Smoothie with Oats

    I mentioned a few weeks ago that I would be jumping back on my green smoothie bandwagon after my holiday bingefest. I've been back to work for a week and have had one every morning since.  The thing I love the most about these smoothies is that you can add whatever fruit your heart desires (or whatever you freezer is stocked with).  The one downfall to my smoothie recipe --- it only has 2 food groups; fruits & veggies, and dairy.  I'm a firm believe (and preacher to my students) that if you are going to eat a meal you should have at the very least, 3 food groups.  I decided to spend some time yesterday morning experimenting with my smoothie recipe and researching nutritional information to see if it would be worth it to add oats into my smoothies.  Adult females need 21+ grams of fibre a day and about 45grams of protein a day. I put together the below chart -- check it out. My opinion is that adding oats is totally worth it.  While the texture changes just slightly when oats are added the flavour doesn't at all.  Tonight I'm going premeasure my ingredients in the blender (except for the frozen fruit) and give the oats the night to soak.  I think this will make the consistency a lot smoother. (update: it didn't make a huge difference at all). I always make a double batch in the morning because my husband and I both drink them.  Here is the nutritional information and recipe for ONE serving. 
    *please note that I added water to this recipe because I've added the oats