Thursday, July 12, 2012

Organization & Availability

I'm definitely not the most organized person on the planet that's for sheezie but I know how an organized pantry helps with motivation in the kitchen.  A few weeks ago my husband helped me make a double batch of my favourite cookies and said he'd be screwed if it weren't of the organization of my baking ingredients.  Yes, I own a label maker and yes, I am deeply in love with it. Best gift ever.

Availability also has a lot to do with people taking the time to make homemade meals.  I never understood people who don't keep staples stocked.  These items rarely spoil and isn't it way more effort to have to keep running out to the store?  I know some people don't like having multiples of items but when items are one sale I'll grab a few packages that way I'm saving some buckaroos and I will have it on hand when I need it. I love spontaneity in the kitchen and having a stocked pantry enables me to be spontaneous. Perhaps this new (much) larger organized pantry will encourage my husband to cook more often...hmm....

Rant done.

I'm off to Toronto for a few days to celebrate with some lovely brides-to-be. Sound the GONG.  I will write when I return.  Enjoy your weekend. It's going to be a beaut (I don't actually know if it will be but I'm going to assume it is...i.hate.rain.)

Wednesday, July 4, 2012

Natural Cleaners & My Inspiration

Wowza! This is a novel...

Last year I started to consider using all natural cleaning products in my home.  I knew for certain I wanted to get rid of the stash of chemical cleaners under my kitchen sink when we started a family but contemplated making the transition when we eventually moved off the farm.  In January of this year one of my closest friends was diagnosed with Hodgkin's lymphoma. Regardless of this diagnosis I've always viewed her as a motivated, positive and strong woman. I cannot even begin to explain to you (and her) just how inspiring she has and continues to be to me.  5 years ago I was lucky enough to have this strong woman stand next to me on my wedding day.  As a token of my appreciation I gave her a ring with the word 'inspiring' engraved on the inside.  Little did I know 5 years later she'd be even MORE of an inspiration to me then I ever thought possible.  She is that person who is always striving to do better and be better.  She is so far from stagnant. She'd blow your mind if you ever met her.

Thank you friend, for all that you do. I love you and appreciate you more then you'll ever know.

My friend and I don't spend a lot of time talking about the C-word. We do however spend a lot of time discussing the positive changes the C-word has brought about in her (and my!) daily life (lives). During our last visit she told me that strong smells, like house cleaners and hand soaps are overwhelming for her. There it was: my push to transition to natural hand soaps and cleaners a.s.a.p. That alone was reason enough for me to take the plunge, however there are a number of other reasons I decided to do it. Not only are there too many products under my sink (clutter! yuck!), they are expensive to purchase and disgusting for my family's health.  Sure, my husband and I don't have children but we do have friends and family with ankle-biters. The very thought of them crawling around on floors cleaned with glow-in-the-dark toxic cleaner makes my skin crawl.  Today I removed all of the my toxic cleaners from under my sink, except the toilet bowl cleaner. Toilets gross me out and seeing how we recently moved into this house I am still working on making the bowls feel like my own. Haha!  Give it a few more weeks and I'll be willing to give up the clorox cleaner. Today I found an awesome and cheap all natural toilet bowl cleaner at the Superstore that I will be grabbing when the time comes. For windows I use an all natural product that my lovely sister-in-law gave me from LL Bean. No more windex for this girl!


Before (10 products)
Yes, I realize this is a food blog so why the heck am I talking about cleaners, right?! Let me explain the correlation. There are many natural, indigestible cooking ingredients that can be used to make your own cleaners.  Orange peels, lemon, baking soda, and white vinegar just to name a few! After much research I have decided on this all purpose cleaner mixture. I figured it costs me about $0.75 - $1.00 for each bottle I make. The most expensive part is the optional essential oil!  If you omit that it will cost you about $0.25 a bottle. Seriously, this is a win-win situation! I'm so pumped.

Update: I just read a very interesting article about mixing vinegar/lemon juice with castile soap. Darn! Omit the vinegar next time you make a patch to avoid any problems. Check out the article here.
After (3 products)
Ingredients
2 teaspoon of Dr. Bronner's Pure-Castile Soap* (I bought lavender)
5 tablespoons of white vinegar
2 teaspoons of borax (in laundry section at the grocery store - also used in laundry for natural white booster and stain remover)
1 teaspoon baking soda
4 cups hot water
15-20 drops of essential oil of your choice (optional; I used lemon)
a spray bottle (I had one from years ago from the dollarstore)

Method
Mix all ingredients together in a spray bottle and use on basically anything except windows & mirrors.

* I finally found Dr. Bronner's in the natural section at the Superstore for $16.00. This product is an 18 in 1 mixture that can be used for anything from face wash to shower title cleaner. $16.00 sounds expensive however it recommends that if you are using it as hand soap that it be diluted with equal parts water.  This bottle will certainly go a long way.

Monday, July 2, 2012

Hello Summer & hydration!

Summer has officially arrived!  I have two blissful months away from school to visit with friends and family, work on the new pad, read, and relax.  I absolutely love my job, but I have to say that it is a million times more work then anyone could have prepared me for. If it weren't for the summer I don't know if I'd make it through. 3 years later and I am just now getting used to the fact that I have to time out my pee breaks, and therefore my coffee and water drinking schedule. Summer not only means freedom from the students but for me it also means freedom to drink numerous coffees in the morning and an enormous amount of water. My oh my, it's the small things in life!

Last summer I challenged myself to walk or jog 5km ever day Monday-Friday and I did it...kicking and screaming.  This summer I plan on getting on an indoor workout routine (I have A/C now afterall!) and drink 10 cups of water every single day.  I rarely take any type of medication, even if I have a headache and often find that drinking 2 huge glasses of water makes a world of difference if I'm not quite feeling like myself.  It is for that reason that I am challenging myself to a water drink-off.  How will I accomplish this?  Premeasure water every morning and make it look pretty! I own a glass jug that holds 10 cups perfectly.  Add a handfull of assorted frozen fruit. I use whatever I have on hand for my daily morning spinach smoothies found here and here. There you have it.  Easy, peasy.

Happy Hydrating!   

Sunday, July 1, 2012

All Around the World


For me, one of the most exciting things about having a blog is seeing where all my readers are from. It blows my mind to think that someone in Mexico could be standing in their kitchen follow a recipe that I created.  The stats pages on my Blogger site gives a breakdown of what countries my readers are from and  how many people are reading my blog in a given day, week or month. June 2012 has been my highest month yet; over 1,100 views!  Thank you everyone for reading. And to all of my Canadian readers

HAPPY CANADA DAY!

 I thought you might be interested in seeing a breakdown of where my readers are from.  This list is in order from largest to smallest following. Pretty neat!

Canada
United States
United Kingdom
Austria
Russia
Germany
Philippines
Australia
Mexico
Brazil


Happy Birthday Canada!


Sunday, June 24, 2012

Chips


Salty snacks are my jam. Sure, chocolate cake is good, but hit me with a bag of Miss. Vickie's potato chips and this girl will be in heaven.  Tonight I was craving a treat so I decided to try out making my own potato chips. OH BABY! It is beyond easy and they are beyond tasty. You seriously cannot go wrong.  Use whatever spices you want to season them.  Dill, chili powder, garlic salt, pepper, the list goes on and on.  Try this out - you won't be disappointed.  I used potatoes that I grabbed from a Farmer's Markets on my way home from work Friday. They were on the small side, so I would recommend using large potatoes so it speeds up the process. It does take some time but it's completely worth it knowing they aren't deep fried and processed. Enjoy!

Yield: Snacks for 2
Ingredients
1-2 large white or red potatoes, slices SUPER thin (depends on how hungry you are)
A splash of olive oil
any spice/herb you love (I used salt and pepper this time)

Method
Wash and slice potatoes super thin. Toss them in a bowl with olive oil and spices. Spread slices on a microwave safe plate, making sure they aren't on top of one another.  Place in microwave for 5ish minutes. Remove from microwave (careful the plate is HOT), flip slices (I'm not sure if you HAVE to do this step... I will experiment this week and let you know). Put back in the microwave for 5 more minutes. Remove when they all have brown flecks throughout. They should be hard to the touch (that's what she said). Remove and let cool for 2 minutes. Serve. 

They should be fine to keep for a day or two in an air-tight if you cannot eat them all.

Thursday, June 21, 2012

Pita Pita

I've fallen in love...again.  Last week a friend introduced me to an amazing Mediterranean fast food place in London called Pita Pita that serves the best hummus I've ever eaten. Ever. Ever.You MUST go!  It's not a place that you want to stay to eat because it's fairly busy, small and packed with teenagers. Definitely more of a grab and go place. I confess....I went again today.  Order the small hummus with chicken and ask for hot sauce on it. You won't regret it! It will last you at least 2 meals and it's under $7.00. That means that it the last 7 days I've had Pita Pita for 4 meals. Dirty...but ohhhhhhhh so good (that's what she said).
Do it.

Pita Pita
456 Wharncliffe Road South, London, ON N6J
(519) 672-0068 ‎

Sunday, June 17, 2012

Food Forward

I received an email forward from my Aunt a few weeks ago with some very helpful food pointers that I thought I'd pass along.  Enjoy!

  • To keep potatoes from budding, place an apple in the bag with the potatoes.
  • When a cake recipe calls for flouring the baking tin, use a bit of dry cake mix instead and there won't be any white mess on the outside of the cake.
  • Wrap celery in aluminium foil when putting in the refrigerator and it will keep for weeks.
  • Cure for headaches: take a lime, cut it in half and rub it on your forehead. The throbbing will go away.
  • Don't throw out all that leftover wine. Freeze into ice cubes for future use in casseroles and sauces.

Saturday, June 16, 2012

Crock Pot Pulled Pork

I've made pulled pork before (here) but it had quite a few ingredients which can be a royal pain in the ass for people who don't have a ridiculous amount of spices like this girl does.  This week I made a super quick pulled pork in tomato sauce and it was great.  I prepared it the night before (took about 10 minutes) and plugged it in on the way out the door in the morning.  Nothing beats coming home to the smell of a home cooked meal and not having to cook it yourself.  Thank you Mr. Crock Pot. I have to say I'm more of a BBQ sauce pulled pork girl, but this tomato based sauce was definitely yummy.
Ingredients
1 pork loin
salt and pepper to taste
2 tbsp olive oil
1 onion, diced
4 cloves garlic, minced
2 tbsp chili powder
2 tsp ground coriander
2 bay leaves
1 large can tomato sauce
2 tbsp brown sugar
2 tbsp cider vinegar
2 tbsp Worcestershire sauce

Method
Toss everything into a large crock pot and coat meat with sauce.  Cover and cook on low for 8 hours. Remove bay leaves. Transfer meat to cutting board and pull apart using two forks.  Add meat back into sauce and stir to coat.  Serve on fresh buns with lots of sauce (that's what she said).

Slacker McGee

I'm sorry for not being around lately. I have been really focused on the house and much less on creating new recipes.  My bad.  Once school wraps up in a few weeks I will certainly have more time to dedicate to the kitchen.  I've been cooking but haven't been trying out new things. Stick with me... I will get my ass in gear soon enough.

Saturday, June 2, 2012

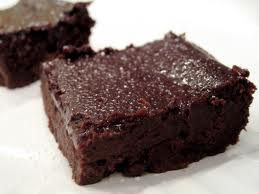
Black Bean Brownies

Yup! You read that right! I recently attended a training workshop on implementing and promoting healthier foods in highschools.  I completely support this endeavour and was pumped to try out some new healthier recipes from Bake It Up, a resource prepared by the Ontario Public Health Association.  While at the training I had the opportunity to sample a few recipes including Black Bean Brownies.  Sounds nasty, right? Think again! I decided that this would be a great experimental recipe to make with my Nutrition students.  They were disgusted when they read the recipe but I was happy to see that most actually sampled and enjoyed the brownies! Success!  The follow recipe is from Bake It Up.


Ingredients
1 can black beans, rinsed, drained and MASHED (do this BEFORE mixing with anything else!)
¾ cup whole-wheat flour
½ cup unsweetened cocoa powder
1 tsp baking powder
1/2 teaspoons salt

3 eggs
1 cup sugar
1/4 cup unsweetened applesauce
3 tablespoons canola oil
2 teaspoon vanilla
1/4 cup mini semi-sweet chocolate chips

M
ethod
1. Preheat oven to 350°F (180°C). Line an 8-inch (20 cm) square metal baking pan with foil, leaving a 2-inch (5 cm) overhang at opposite ends. Lightly spray foil with non-stick cooking spray.

2. In a large bowl, combine beans, flour, cocoa powder, baking powder and salt. With a wooden spoon, beat in eggs, sugar, applesauce, oil and vanilla until well blended. Stir in chocolate chips. Pour batter into prepared pan.

3. Bake for 30-35 minutes, or until just a few moist crumbs cling to a tester inserted in the centre. Do not over-bake. Let cool in pan on a wire rack. Using foil overhangs as handles, remove from pan and transfer brownies to a cutting board. Cut into squares.

Monday, May 21, 2012

Spaghetti Squash with Tomato Sauce

What an incredible long weekend it has been - sunshine, a road trip, a wedding celebration, visits with friends, morning coffees on the deck and great food. Do we really have to go back to work tomorrow? BLAH!

Tonight I made spaghetti squash with with a ground chicken and tomato sauce. Nice and light -- perfect since my husband ran off to soccer just after we ate.  No sides needed for this healthy meal!  We are huge fans of spaghetti squash in this house (mentioned here as well).

Ingredients
1 spaghetti squash
splash of olive oil
2 cloves garlic, minced
1/4 onion, chopped
1/2 lb ground chicken
1/2 jar tomato sauce
salt & pepper to taste
1 handful fresh spinach
Parmesan cheese to garnish

Method
Cut squash in half lengthwise and place on a parchment paper lined cookie sheet flat side down. Bake at 400 degrees for 45 minutes. While that is cooking throw the chicken on a frying pan over medium heat with olive oil, salt and pepper.  After a few minutes add garlic and onion in with the chicken. Once the chicken is cooked through (about 8 minutes), add spinach and tomato sauce. Simmer for 5 minutes and remove from heat.  Once squash is done cooking use a folk to remove the squash from its skin. Serve pasta sauce over the squash and garnish with Parmesan cheese.  YUMMMMMY!

Wednesday, May 16, 2012

Pizza Dough Balls

Happy Mother's Day!

*I started to write this post the day after Mother's Day and am just now getting around to posting it.  It's been a crazy busy week yet again.

We hosted a Hubby Birthday/Mother's Day/New Home Open House dinner on Sunday and had family for dinner.  I made lasagna, caesar salad and garlic bread.  It was a meal that I made ahead of time so I was able to visit with family on the deck while it cooked in the oven. 

I had fresh pizza dough in the fridge that was meant for lunch on Saturday with my Mom but she broke her foot and was unable to travel this way for Mother's Day weekend. Poor lady (Don't worry! I went home to see her!).  I decided to use the dough to make pizza dough balls.  It was SO easy and they were a huge hit!  I will be making these again for sure. I f'n love pizza.

Ingredients
Fresh pizza dough, separated into 18 pieces
18 small cubes of mozza cheese
18 slices pepperoni
1 can pizza sauce
1 tablespoon olive oil
1/2 teaspoon of assorted herbs/spices (oregano, basil, parsley, thyme, garlic powder)
2 teaspoons Parmesan cheese

Method
Place a cube of cheese and a slice of pepperoni in the middle of a piece of dough, wrap and press seams together.  Place seam side down in a greased glass pie plate.  Repeat 17 more times!  Mix olive oil and herbs/spices and paint over the top of the dough balls.  Sprinkle with Parmesan cheese.  Bake at 400 degrees for 20-22 minutes.  Serve with warmed up pizza sauce for dipping.


Monday, May 7, 2012

Weekend Omelets

I think most people would agree with me when I say that weekends are sacred.  They are a time to regroup, relax, complete things on the never ending to-do-list, and spend quality time with loved ones. I am far from a morning person, but my absolute favourite time of the weekend is sipping on coffee in the morning with my husband.  It is pure relaxation.  It was especially satisfying this weekend since it was our first weekend in our new place and we are working on establishing new routines and rituals.  To accompany our mugs freshly ground Starbucks Christmas Blend coffee (scored it here) I made big ol' omelets. Delish!

Yield: 1 omelet

Ingredients
2 whole eggs
1 egg white
**Toppings will vary depending on your tastes
onion, chopped
Spinach, chopped
cheese, grated
red pepper, chopped
spicy salami, cubed
salt & pepper
butter

Method
Over medium to high heat, melt butter in a medium frying pan. Beat eggs, salt and pepper together.  Pour into pan once butter is bubbling. Sprinkle toppings on one side of eggs.  Lower heat to medium, and cook egg until it's just about cooked through. Flip the omelet in half and cook a few more minutes until egg is cooked.
Enjoy!

Sunday, May 6, 2012

French Fries

French fries are where it's at. Unlike pizza I am fairly picky when it comes to the fries I like.  They need to be seasoned properly and cannot be mushy at all.  I obviously prefer the deep fried fast food ones, however I know this isn't an option on a regular basis.  My students and I were discussing our favourite foods this past week and I was amazed at how many of them believed the frozen fries that are purchased from the grocery store to be a healthy option. Most had no idea that they are in fact pre deep fried and assumed because they bake them at home they were good for you. I wish. I found this on the McCain Foods website (I couldn't seem to location nutritional information but this will do);

FAQ: Are your frozen French fries already fried?

Yes, some of our products are par fried in vegetable oil. Par frying is a hot, fast, frying method that prepares the product for the cooking instructions as noted on the package. All of our products require additional preparation/cooking prior to eating; they are not considered Ready to Eat.
(More information found here)

I make homemade potato wedges every so often (here & here) but this week I made fries instead, and I have to say I like them better then the wedges. This girl can't resist a crispy fry. If you have a french fry lover in your house I totally recommend these. I served them with my homemade chicken fingers (here). Enjoy!

Yield: 2 servings

Ingredients
2 large yellow potatoes
1/2 teaspoon seasoning salt
1 tablespoon olive oil
1 teaspoon balsamic vinegar

Method
Wash potatoes and dry them thoroughly with a dish rag.  With skins on, cut into long pieces (about the width of your pinky finger). Put in a medium sized bowl and toss with balsamic vinegar and olive oil. Coast with seasoning salt (or any of your favourite spices/herbs).  Bake at 400 degrees on a parchment lined cookie sheet for about 30 minutes, flipping once half way through.

Wednesday, May 2, 2012

KD

Our night before moving meal. Amazing....

Nana


Phew!! I'm happy to say we are moved into our new home and are slowing working on making it a home. What a whirlwind the last week has been.  7 days ago my family lost my lovely 95 year old Nana who I introduced you to here.  She will certainly be missed.  I think I got the cooking bug from her.  I remember her always cooking up something in her kitchen...I can picture her now...

I'm exciting to start building memories in our new home.

Home sweet home.

Saturday, April 21, 2012

We are moving!

I apologize for the lack posts lately.  The coming two weeks will be a little slow around my blog too.  We are in the process of moving (YA!!!!) and are working on emptying out the freezer and fridge as best we can so we don't have to move it because let's face it, the less we have to pack the more sane I will be.  Our meals have been a random mix match of stuff lately and definitely not blog worthy.  This weekend will be spent packing like superstars so this morning I whipped together blueberry bran muffins found here for an easy to grab breakfast and snack.

I hate packing...so much...

Wednesday, April 11, 2012

Jerk Update

...and I'm not talking about an update of my students...

A few weeks ago I attempted Jerk Chicken here and wasn't overly thrilled with the outcome.  I wasn't able to get a true read of how tasty or gross it was since there was a fairly significant layer of crispy burntness (that's an official cooking term, right?) on the outside.  I'm back to report that it is YUMMY!  I baked a few chicken drumsticks rolled in the dry rub for 40 minutes at 400 degrees (rotating once) and served it with a rice/bean mixture.  A true Jamaican meal. The only thing we were missing was the Jamaica sunshine and the unlimited drinks ;)  Next week I am going to try making a new Jamaican BBQ sauce. I am determined to find a recipe that tastes JUST like the one we loved while on vacation.

Yields: 6 large servings

Rice Ingredients
1 cup basmati rice
2 cups water
1/2 teaspoon dried chili pepper flakes
splash of Tabasco (to taste)
1/2 cup salsa
1 can bean medley, rinsed and drained

Method
Cover and bring everything but the beans to a boil.  Turn to low heat and simmer for 13 minutes. Stir in beans and let sit on warm burner for 5 additional minutes (burner should be turned off).

Sunday, April 8, 2012

Spinach & Cheese Dip (updated recipe)

My go-to appetizer is definitely my spinach dip that I first introduced you to here.  It seems that every family get together I attend I am requested to bring this yummy dip, and this weekend was no exception. I made a few minor alterations to the original recipe and my family agreed that the changes were good ones. Here it is. Enjoy!

Ingredients
1 package light cream cheese
1/2 package frozen chopped spinach, thawed & drained (or 2 handfuls of fresh spinach chopped)
3-4 tablespoons onions, diced
1/4 cup Parmesan cheese
2 cloves garlic, minced
1/2 cup grated medium cheddar cheese
1/2 teaspoon paprika

Method
Preheat oven to 400 degrees. Throw everything except a little cheddar cheese and the paprika into a bowl and mix until just incorporated. Transfer mixture to a small ovenproof dish and top with remaining cheddar and paprika. Bake for 15 - 18 minutes. Serve with baked pita wedges, tortilla chips or naan bread. SOOOOOOOOOOO delish!

Friday, April 6, 2012

Happy Easter

Happy Easter!

To all of my family, friends, and blog readers, Happy Easter!  
I hope you have a long weekend filled with love, laughter and a shitload of good grub.  If you are hitting the highway, travel safely.

~Jill


Sunday, April 1, 2012

Raspberry Beer

picture from
 www.lilyboutique.com/blog
Raspberry beer equals hangover headache

...but completely worth it.  This stuff will sneak up on ya if you aren't careful.  My sister-in-law also made these refreshing beverages for our family gathering last night. I will be taking advantage of these this summer! Thanks LT for all the yummy treats last night.

Ingredients
1 can of frozen lemonade concentrate, thawed
1/2 cup vodka
4 coronas
1 handful frozen raspberries


Method
Throw lemonade and vodka in a jug and mix.  Add corona and berries just before serving so it doesn't go flat.  Garnish glass with a slice of lemon.
to.die.for.

psssttt: This was my 200th post! Crazy, eh?

Pizza Muffins

Picture from www.foodbeast.com
Last night we got together with my husbands side of the family to celebrate a few birthdays.  His youngest sister has recently taken up crafting, baking and cooking (thanks to Pinterest!) and made an incredibly tasty appetizer.  I've mentioned more then a few times that in love with pizza so you can imagine my excitement when I saw PIZZA MUFFINS fresh out of the oven when I arrived at the in-laws last night.  They were yummy, easy to eat and apparently relatively easy to make.  My sister-in-law made them in a regular sized muffin tray but we collectively decided that they would be even more awesome as bite sized muffins.  I will certainly make these in the future :) yummmmers.

The following recipe was taken from here!

Ingredients
3/4 cup flour
3/4 teaspoon baking powder
3/4 cup whole milk
1 egg, lightly beaten
I cup mozzarella cheese, shredded
1 cup pepperoni, cubed
1/2 cup pizza sauce
2 Tablespoons finely chopped fresh basil

Method
Preheat oven to 375o. Grease a 24-cup mini muffin pan. In a large bowl, whisk together the flour and baking powder; whisk in the milk and egg. Stir in the mozzarella and pepperoni; let stand for 10 minutes. Stir the batter and divide among the mini-muffin cups. Bake until puffed and golden, 20 to 25 minutes. Microwave the pizza sauce until warmed through, then stir in 1 Tablespoon basil. Sprinkle the muffins with the remaining 1 Tablespoon basil. Serve the puffs with the pizza sauce for dipping.

Friday, March 30, 2012

Dance Mixes & Avocado Pie

On St. Patrick's day my husband and I were on day 2 of withdrawal from our trip to Jamaica and decided that we needed food, company and lots of drinks asap.  We invited some peeps over for green beer and pizza and to celebrate St. Patty's day in style and spent the evening laughing, drinking and listening to old school dance mix CD's, circa 1993-1999.  Our fav of the night - dancemix '93. Oh, the memories! When did I get so old? I digress....story of my life!

My lovely lady friends brought some very yummy treats for dessert, including chocolate chip cookies, Guinness cupcakes with Bailey's icing, and avocado pie!  I'm drooling just thinking about them.  The avocado pie is something that I was absolutely blown away by.  My friend got the recipe from a blog called 'How About Orange' which is definitely worth checking out.  Here is the recipe.  Hope you like it as much as we did! Thanks JC :)

Ingredients
2 peeled avocados
½ cup fresh lemon juice
14 oz. can sweetened condensed milk
9" graham cracker crust
whipped cream (I had it without this and it was great!)

Method
In a blender put the peeled avocado and ½ cup lemon juice. Pulse a couple of times. Add condensed milk and blend till creamy. Pour into the pie shell and refrigerate for 1 hour. Add whipped cream when serving.

Wednesday, March 28, 2012

Potato Wedges on the BBQ

I wanted to serve potato wedges with the jerk chicken and came up with this is super duper easy recipe. This would be great with burgs and dogs in the summer.

Yields: 2 servings
Ingredients
2 large potatoes
1 tablespoon olive oil
2 teaspoons taco seasoning

Method
Cut potatoes into wedges.  Throw into a bowl and coat with olive oil.  Coat with taco seasoning.  Wrap wedges in tin foil and put on the BBQ over medium heat for 40 minutes, rotating once.

Enjoy!

Dry Jerk Rub & Jamacian BBQ Sauce

I told you here that I would write about the good, the bad, and the ugly when it came to my cooking so here it is. I had very high hopes that my jerk chicken meal was going to be amazing but I ended up burning the shit out of the chicken.  Although the skin/rub of the chicken was charred the chicken was very yummy once the skin was peeled off. It might have been because of the Jamaican BBQ sauce I made to go with it.  In Jamaican the jerk chicken was served with a ridiculously delicious BBQ sauce; the best I've ever had (that's what she said).  My mission is to find this recipe.  I will keep you posted with my progress ... because you care, right?! Humour me...

Dry Rub Ingredients (Yields about 1/2 cup of rub)
1 1/2 tablespoons allspice
6 tablespoons salt
5 tablespoons garlic powder
4 tablespoons white sugar
1 tablespoons chili powder
1/2 tablespoon ground cloves
2 tablespoons dried thyme
2 tablespoons ground black pepper
4 tablespoons cayenne pepper
1 tablespoon ground cinnamon

Method
Mix all ingredients together in a airtight container. Use about 1 tablespoon for two chicken breasts. Rub the mixture all over entire chicken breasts. I used skin on, bone in which was a great choice because the skin ended up keeping the chicken very moist despite the outside being burnt to a crisp.   Cook over medium heat on the BBQ for 40 minutes (or until juices run clear), turning once every 5 minutes so they don't burn like mine did.

Jamaican BBQ Sauce Ingredients (Yields 2 cups)
1 tablespoon olive oil
1/2 onion, chopped
2 green onions, chopped
1 tablespoon chopped jalapeno pepper
1 cup ketchup
1/2 cup chicken broth
1/2 cup molasses
1 tablespoon lemon juice concentrate
1 tablespoon soy sauce
1 tablespoon Worcestershire sauce
1/2 teaspoon dry mustard (if you don't have this, no big deal!)
1/2 teaspoon thyme
1 teaspoon salt
1/2 teaspoon pepper
1/4 teaspoon cinnamon
1/4 teaspoon ground nutmeg

Method
In a pot over medium heat warm olive oil and saute onion and jalapenos for 5 minutes. Add everything else and simmer for 10 additional minutes. Throw leftovers in the fridge.

Saturday, March 24, 2012

Salted Water

This week my Nutrition students made pasta with homemade fresh tomato sauce.  I get such satisfaction from watching teenagers in the kitchen having so much fun while working with food.  Can you believe that some of them had never boiled water before?! Crazy!  I cannot wait to have little kiddies running around my house so I can get them in an apron.  Cooking with kids can be so much fun.  I digress...

Back to the boiling water.  A lot of student asked "where is the salt?", to which I responded "This is a low sodium recipe, no salt needed".  A few students were confused because they were taught at home to cook pasta in salted water.  This is not something I do in my own kitchen at home and told them it wasn't necessary.  I spent the rest of the day wondering if I had missing a step all these years when I cooked pasta.  I spent some time doing some reading and have found that there aren't any benefits of adding salt. This is what I dug up

 Myths about salting your pasta water
  • It makes pasta less sticky
  • Enhances the flavour of the pasta
  • Makes the water boil faster
  • Makes the water hotter
Facts about salting your pasta water
  • costs you more money to add salt
  • Increases sodium in your food
  • an extra step
There you have it folks, breaking news. Quick, call all of your friends...

Individual Portions

This morning my husband and I had a great visit with a very dear friend.  Great company, coffee, laughs and doughnuts from Spicer's - can't get much better (ok, ok, maybe if we were visiting on the beach in Jamaica it would make it a teeny bit better!).  My lovely lady friend has been feeling under-the-weather so I wanted to bring her some grub to toss in her freezer.  I opted for homemade carrot soup found here.  I wanted to make it easy to warm up so I froze it in individual portions.  Someone please tell me why I have never considered doing this before!!  I'm always making large batches of soups, chili's and stews so that I can toss some in the freezer and always end up freezing in a large container. No more of that.  Here is the simple process;

1. Cook the goods
2. Pour into cereal bowls
3. Place bowls in freezer over night
4. Fill sink with 2 inches of hot water and place bowls in for 1 minute
5. Flip bowl over and the goods will pop out (might need a little help by sliding a knife down the edge)
6.  Place into freezer bags & label with a sharpie
7. Toss back in the freezer

ps: am I the only one who likes to take a whiff of the sharpie when I use it?....

Monday, March 19, 2012

Tin Foil Chicken on the BBQ

Western Ontario is currently experiencing ah-maaaaazing weather! When I rolled in from work with the sunroof open, windows down and my tunes cranked (Jay-Z; I'm gangsta like that), I decided that I would be ridiculous not to BBQ something for dinner.  I had 4 chicken thighs in the fridge so I decided on a tin foil package dinner.  Super-duper easy and hardly any dishes. Cha-ching!


Ingredients
4 chicken thighs (bone in, skin on)
2 medium potatoes, skin on, cubed (I used peeled sweet potato in my foil package)
1 carrot, sliced
1 stalk celery, sliced
1 yellow pepper, chopped
A few mushrooms
1/2 onion, chopped
1 tablespoon olive oil
sprinkle of your fav herbs/spices (I used paprika, rosemary, basil, thyme, oregano and garlic powder)

Method
Throw everything in a bowl and mix until coated. Separate everything into two servings.  Wrap each serving in tin foil and chuck onto the BBQ over medium/high heat (350ish degrees) for 40 minutes or until chicken juices run clear.  Rotate once half way through.

Ya Mon! Jerk Chicken

My apologies for the lack of posts over the last few weeks.  I was working ahead on a course I'm taking and finishing reportcards off at school so that my husband and I could escape to Jamaica over March Break.  It was 4 days of eating, drinking, sunning and relaxing.  I hadn't really be exposed to Jamaican food before this trip and figured out that it is mighty yummy.  While sitting on the beach, my husband and I feasted on jerk chicken and sausage (that's what she said).  I will attempt to recreate this deliciousness over the next week or so.  Be sure to check back!

Sunday, March 4, 2012

Caprese Kabobs

This weekend my husband and I travelled to Toronto for a very special celebration.  A close friend of mine and the man of her dreams are getting hitched this summer.  We celebrated their engagement in style at a beautiful gathering of friends and family on Saturday afternoon.  The company was lovely and the abundance of food was delicious.  Since we were traveling about 2 hours to attend we had to be fairly selective as to what appetizer we were going to bring.  The expected guest list was about 50 people so we wanted to make 50 of something that could be transported easily and didn't require any cooking once we arrived.  I decided on caprese kabobs and was very happy I did.  The prep was about 15 minutes and there was pretty much zero clean up! They looked pretty too! I will certainly make these again and again! Below is a recipe for 25 kabobs.

Sidenote: Bocchini is a very mild cheese that takes on the flavour of basically anything. Most people think they don't like this cheese because it doesn't have a flavour.  Make sure you season this cheese in some way before serving or it ends up being a waste of money (and calories!).

Ingredients
1 container of cherry tomatoes
1 package of fresh basil
1 container of cocktail sized bocchini cheese, drained (I grabbed PC brand for $4.99 a container)
1 tablespoon balsamic vinegar
2 tablespoons olive oil
sprinkle of dried basil
salt and pepper
25 mini skewers (I cut large ones in half)

Method
Drain brine from cheese.  In the cheese container add balsamic vinegar, olive oil, dried basil, salt and pepper. Coat cheese in mixture.  Let cheese marinade for at least 1 hour (I did it over night). The longer it marinades the more flavour it will pick up.  On each kabob add one cherry tomato, one small basil leaf and 1 piece of cheese.  Repeat until everything is used up.  Save leftover marinade to drizzle over the top once you serve. Serve at room temperature to optimize flavour of the cheese.

Congratulations B & A!

Saturday, February 25, 2012

Belated Pancake Tuesday

Oops!  We missed Pancake Tuesday this year because I was out of town at my Brother and Sister-in-laws place for dinner.  That makes today belated Pancake Tuesday (on a Saturday morning...meh...).  Check out my quick and easy (that's what she said) pancake recipe here that makes 6 pancakes. The perfect amount for two people with a big weekend morning appetite. 


Thursday, February 23, 2012

Classic Macaroons


I had some leftover coconut from the shrimp I made last week and wanted to get rid of it so I decided to make macaroons.  I've only made them once before (here), and I wasn't a fan of the chocolate variety however I enjoyed these ones much more. Hope you like 'em too.

Yield: 12 medium cookies

Ingredients
1 1/3 cups flaked coconut
1/3 cup sugar
2 tablespoons flour (I used regular but I'm sure you could use whole wheat)
2 egg whites (I hate wasting the yolk so I cooked them up to throw on my puppy's breakfast tomorrow)
1/2 teaspoon vanilla extract (I'm still working on the Mexican stuff I told you about here)

Method
Mix all dry ingredients together.  Add in wet ingredients. Drop by spoonful onto greased cookie sheet. Bake at 325 degrees for 18-20 minutes.

Smells like a tanning salon in here right now...I love the smell of coconut!

Hit me baby one more time...

Thanks a million (or should I say ten thousand) for reading my blog. Today my blog reached 10,000 views!  I've been working on this venture for one and a half years and I've enjoyed it far more then I ever thought I would.  When I started writing I expected it to be a summer project. I'm really happy I've stuck with it - I've tried out so many different foods and recipes and rarely repeat meals. In fact, I'm close to 200 posts! Let me know if there is anything you'd like me to try try and blog about.

Monday, February 20, 2012

Bacon & Pineapple Appetizer

Happy Family Day!
We've had a wonderful weekend filled with family and friends and it's not even over yet! Today we are going to the in-laws place for an impromptu family lunch.  I was asked to bring an appetizer.  Living a 30 minute round trip to the closest grocery store (and I had already been into town 2 times yesterday) I decided to figure out a yummy app using only ingredients that I had hanging around. hmmm...a golden pineapple sat on my counter and a package of bacon that I didn't end up using for breakfast yesterday was in the fridge.  Thanks to Pinterest I found a perfect recipe here. I haven't tried them yet but will update you tonight. Let's be honest though, anything with bacon is DELISH!

Evening update: The bacon basically fell off the pineapple. It looks very messy to serve but tasted great.  Next time I plan on wrapping thinly sliced ham around the pineapple since it has a lot less fat and will likely stay put!

Ingredients
1 pineapple, cut into chunks (or one can of pineapple drained)
1 package bacon, each piece cut in half crosswise
25 tooth picks, soaked in water for 10 minutes
1 cup ketchup
1/4 cup brown sugar
1 tablespoon Worcestershire sauce
1 tablespoon soy sauce
5 drops of Tabasco
salt and pepper

Method
Boil ketchup, sugar, Worcestershire, soy sauce, Tabasco, salt and pepper in a sauce pan for 10 minutes. Set aside. Wrap a half piece of bacon around each chunk of pineapple and secure with a tooth pick. Place on a roast rack in a deep(ish) pan and cook for 15 minutes at 400 degrees.  Remove, baste with homemade BBQ sauce and continue to bake for 15 more minutes.  Remove, plate and serve with leftover BBQ sauce.

Wednesday, February 15, 2012

Pizza Made With Love

Happy Valentine's Day
If you read my blog regularly (or know me personally) you will know that pizza is absolutely, without a doubt my favourite food. Check out all my reasons for diggin' it here. Last night my wonderful husband cooked for me!!  He made homemade BBQ chicken pizza. Definitely worth the wait! You can find the crust recipe here. All you'll need to do is mix 2 teaspoons honey with 3/4 cup of your favourite BBQ sauce.Paint on mixture over rolled out crust. Cube two chicken breasts and cook in a frying pan with a little olive oil until cooked all the way through. Add to top of dough. Sprinkle top with mozza and Gouda cheese. ENJOY! 

Baked Coconut Shrimp

I'm not a fan of coconut. The hubster on the other hand is slightly in love with it. One of his favourites is coconut shrimp so I decided to hook him up tonight for dinner.  They turned out pretty good! I will for sure be using this recipe again.  It will be great for an app when friends come over.

Ingredients
20 ish raw, peeled shrimp (tail on or off)
1/2 cup Japanese bread crumbs (do NOT use regular bread crumbs)
1/2 cup shredded coconut
2 eggs, beaten
1/4 teaspoon Cayenne pepper
pinch garlic powder
Method
Preheat oven to 425 degrees.  Thaw out shrimp. Mix Japanese bread crumbs, coconut, Cayenne pepper and garlic powder. In a separate bowl beat two eggs. Using tongs dip shrimp in egg then into bread crumb mixture to coat.  Place coated shrimp on parchment lined cookie sheet.  Bake for 12 minutes, turning once half way through. Serve with a a Thai chili dipping sauce. YUMMMMY!

Tuesday, February 7, 2012

Boss Hog's


A few friends from work and I decided to celebrate the end of semester one and went out for a kick ass meal at a new place called Boss Hogs in London.  The owners have won first place at many Ribfests around the province and I can understand why. It is a pretty small place with about 12 tables and a bar but it is fantastic! Perfect for grub and a beer at lunch. If you like smoked meats, ribs or nachos I suggest you stop by. Prices are good, food is awesome and service is fantastic.

Definition
Boss Hog: Someone who is straight ballin;. Does whatever he wants, whenever he wants.
Example:
                     Tara: Tim is pretty hardcore about his nacho toppings.
                       Jill: Yeah, that's because he is boss hog's.
*Definition from Urbandictionary (man! that site makes me laugh...)

ECS Coffee Inc.

Remember when I mentioned here that if this teaching gig doesn't work out I'd love to own a coffee shop? Thanks to my in-laws I now have a mini coffee shop in my kitchen; A Tassimo!  I'm the first to admit when these things first came out I thought they were a ridiculous waste of money but I've been converted.  We only brew about 4 cups a week using the machine since we have a regular coffee maker and don't see a point in using the Tassimo for regular coffee. We use it for lattes, cappuccinos and specialty coffees.  This weekend we headed to the GTA and hit up a great place called ECS Coffee Inc..  It is an online coffee store that has one showroom in Burlington, Ontario (that gives out free beverages! Any hot drink of your choice!). You should have seen the people there on Saturday.  At least 100 people and every person walking out was carrying a box of goods. We dropped over $60.00 on coffee. Opps!  They sell a ton of products including Starbucks coffee beans.  We adore Starbucks Christmas Blend so we stalked up. One disappointment - - Cadbury Hot chocolate. Don't buy it!  Instant hot chocolate tastes a million times better.

ECS Coffee Inc. offers free shipping on orders over $100. It has a huge selection of products including individual packets for $0.90 so you can sample before you buy (I should have done that with the hot chocolate!), and prices are a wee bit cheaper then regular retail stores. Check it out!

Cheers!

Wednesday, February 1, 2012

Cauliflower

Cauliflower doesn't show its' face (head?) around here often.  I don't hate it but I definitely don't love it.  I'm always looking for ways to add more of the 'good stuff' into our meals so we can enjoy the 'bad stuff' without feeling the guilt.  Today I made roasted cauliflower for an after school snack and it turned out far better then I thought it was going to be. My husband even tried it and didn't think it was bad at all (although he did say he prefers kale chips).  I roasted it with a little Slap Ya Mama sprinkled on top to add some kick. If you are salty snack fan give these a try!

Ingredients
1 head of cauliflower
3 tablespoons olive oil
sprinkle with fav seasoning (salt & pepper work too!)

Method
Cut cauliflower into medium chunks.  Coat with olive oil and sprinkle season on evenly.  Spread on a parchment paper lined cookie sheet and roast at 400 degrees for 45 minutes, turning twice. Let cool slightly before eating.

Next time I buy cauliflower I'm going to try to add it to mashed potatoes. I've heard good things...

Pineapple Green Smoothie

I'm a jerkface. I'm sorry I've been so neglectful lately.  I haven't had a whole lot of time these last few weeks and therefore haven't been creating new and exciting meals. Exams are marked, report cards are written and I've finally learned to navigate through the never ending Pinterest world, which means I have time to cook and write. Excuses, excuses. I sound like my students...

Sidenote: Want to follow me on Pinterest? I'd love that! Click here.

I mentioned here that I was fighting off another cold a few weeks ago and was desperate to feel better without any medication.  Those spinach smoothies... well, I've been hittin' them pretty hard, and haven't looked back since (that's what she said).  My husband and I now have them every morning before work. With some suggestions from a few friends, I've figured out my absolute favourite concoction and wanted to share it with you. I eyeball everything I put in so don't feel like you have to measure out anything. The great thing about these smoothies is that you can throw in whatever fruit you have hanging around.

Yield: 2 large shakes

Ingredients
1 1/2 cups frozen pineapple chunks*
3/4 cup fat free vanilla Greek yogurt**
1 1/2 cups milk
4 handfuls of fresh baby spinach
 
*I just got home from No Frills where I scored pineapples for $1.47 each. I purchased 3, chopped 'em up and chucked them in the freezer in a big ol' freezer bag.
** Here is a picture of the brand that I buy. This container is $3.99 and can be purchased at No Frills or the Superstore.

Method
Throw everything in a big blender and mix for 1 minute, stirring once. If you find it to be too tick, add a little more milk. Enjoy!